
1. Getting started
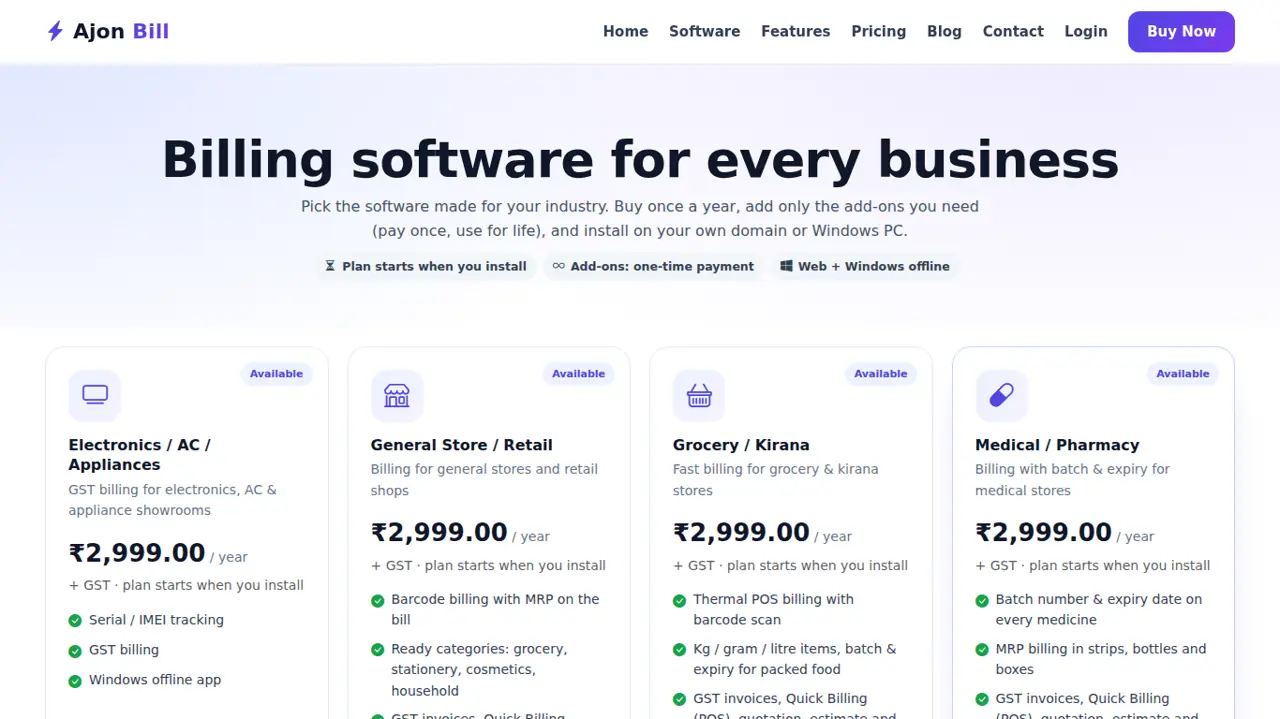
Restaurant / Cafe is GST billing, stock and accounts software made for quick thermal billing for restaurants, cafes and bakeries. It runs on your own website (hosting) or on your own Windows computer - your business data stays with you. Made for this business: Menu by category, table / token number, thermal bills, stock optional.
- You need: a licence (bought on ajonbill.com), and either hosting with PHP 8.1+ and MySQL / MariaDB, or a Windows 10 / 11 computer.
- Two parts: your ajonbill.com account (licence, downloads, add-ons, renewals, support) and your billing software (bills, stock, accounts).
- Keep this manual open in another tab - every chapter is step by step with real screens.
2. Buy a licence & your account
- Open www.ajonbill.com → Software, choose Restaurant / Cafe and click Buy now.
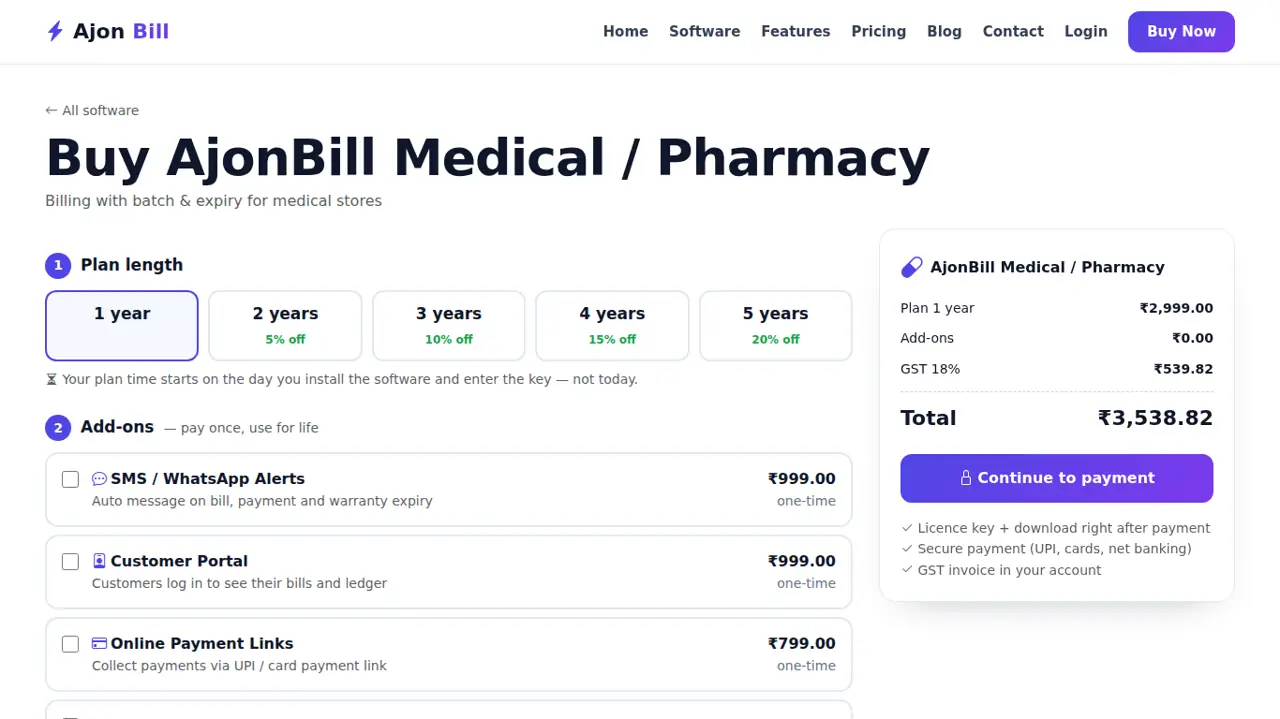
- Choose the years, tick any add-ons you want now (you can add them later too) and pay online.
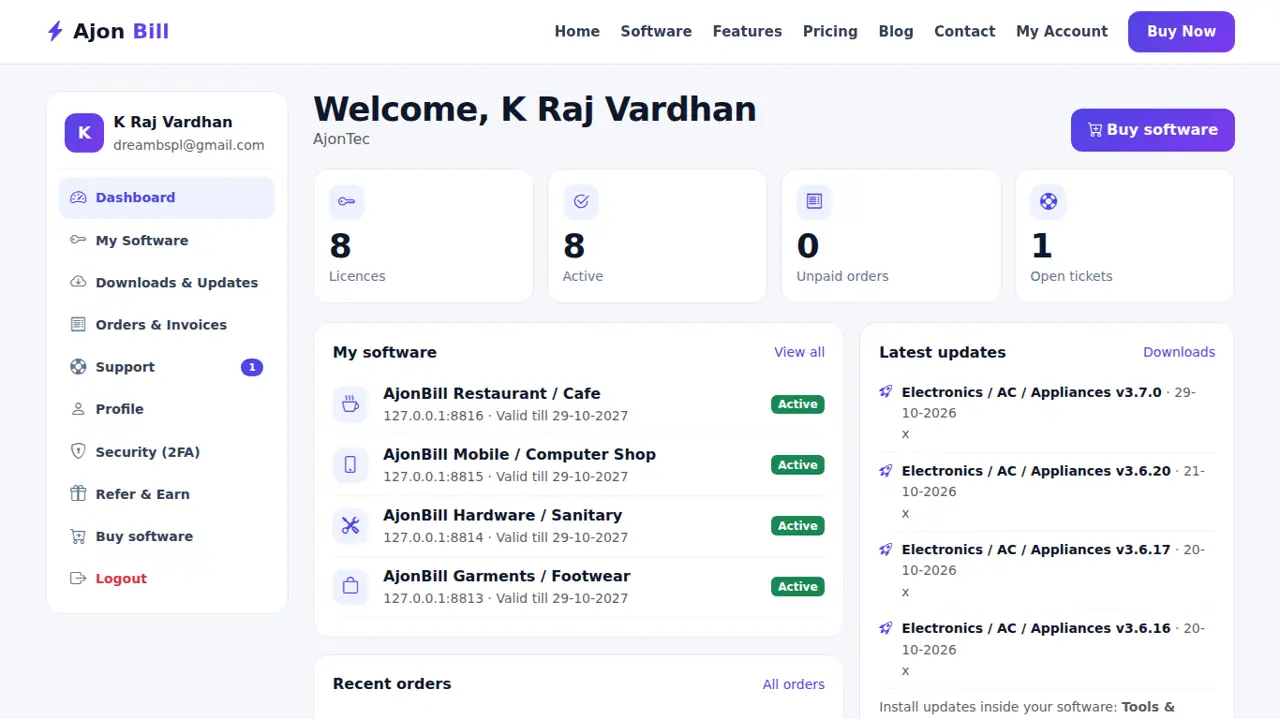
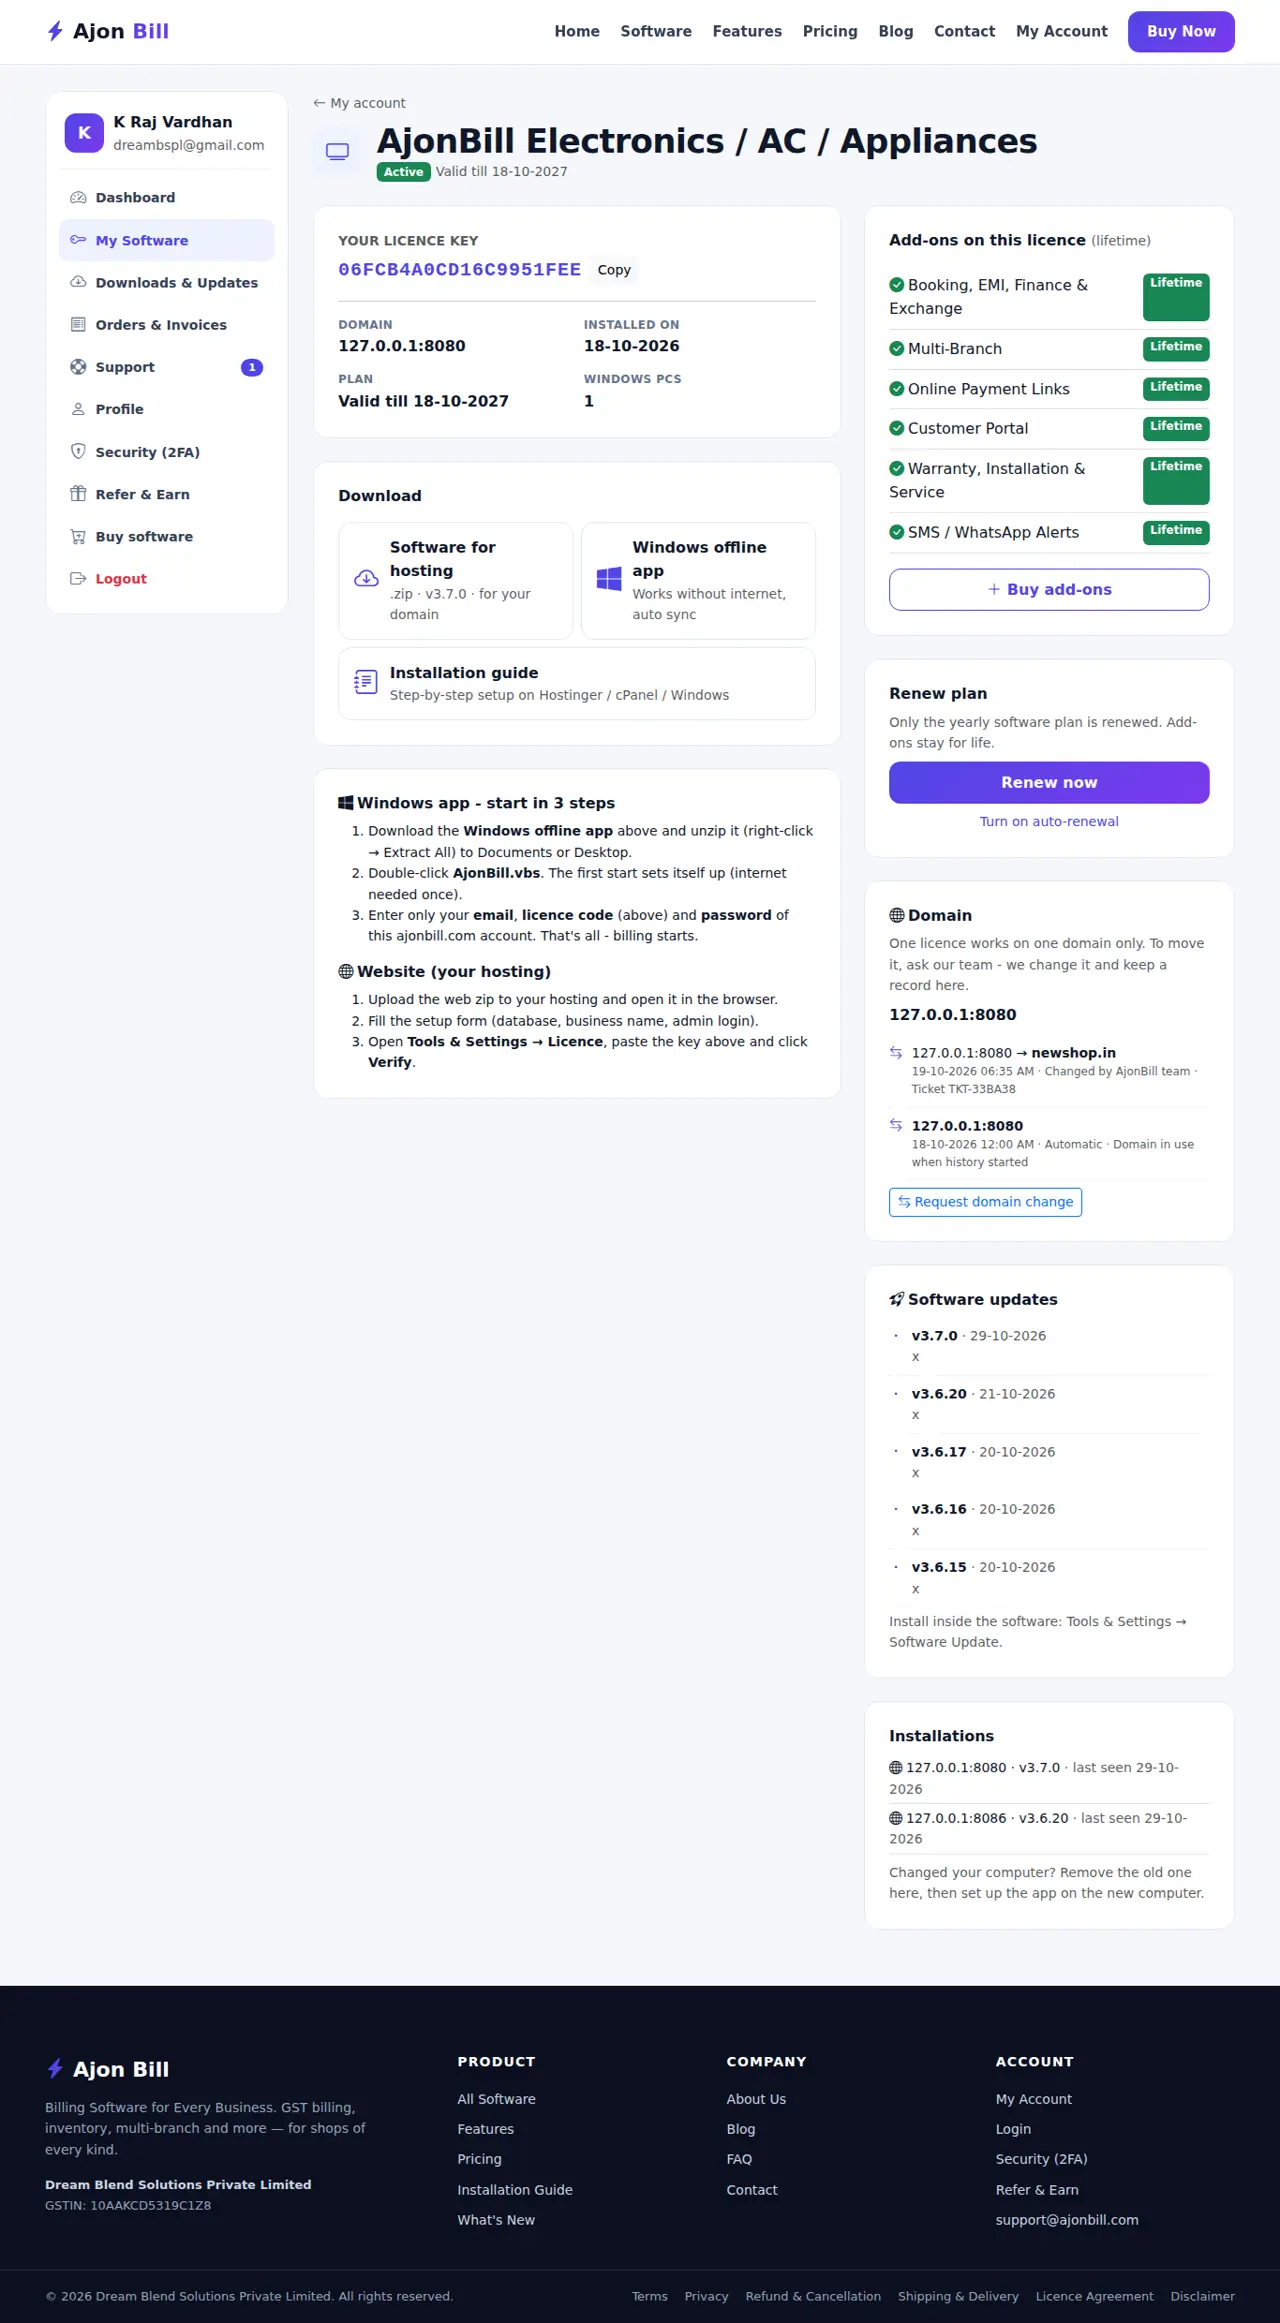
- Your licence code and downloads appear at once in My Account → My Software and are emailed to you.
- Your plan starts on the day you install, not on the day you pay.
3. Install on your hosting (website)
3.1 Make a database (Hostinger / cPanel / CloudPanel)
- Log in to your hosting panel → Databases (Hostinger: Websites → Manage → Databases → MySQL Databases; cPanel: MySQL Database Wizard; CloudPanel: Sites → your site → Databases → Add Database).
- Create a database, a user and a strong password. Write the database name, user, password and host (usually
localhost).
3.2 Upload the software
- In My Account → My Software download the website package (zip).
- Hosting panel → File Manager → open
public_html(CloudPanel:htdocs/your-domain) → Upload the zip → Extract it there. - Make sure the
storagefolder is writable (permission 775). - Turn on SSL (https) for your domain in the hosting panel.
3.3 Run the installer
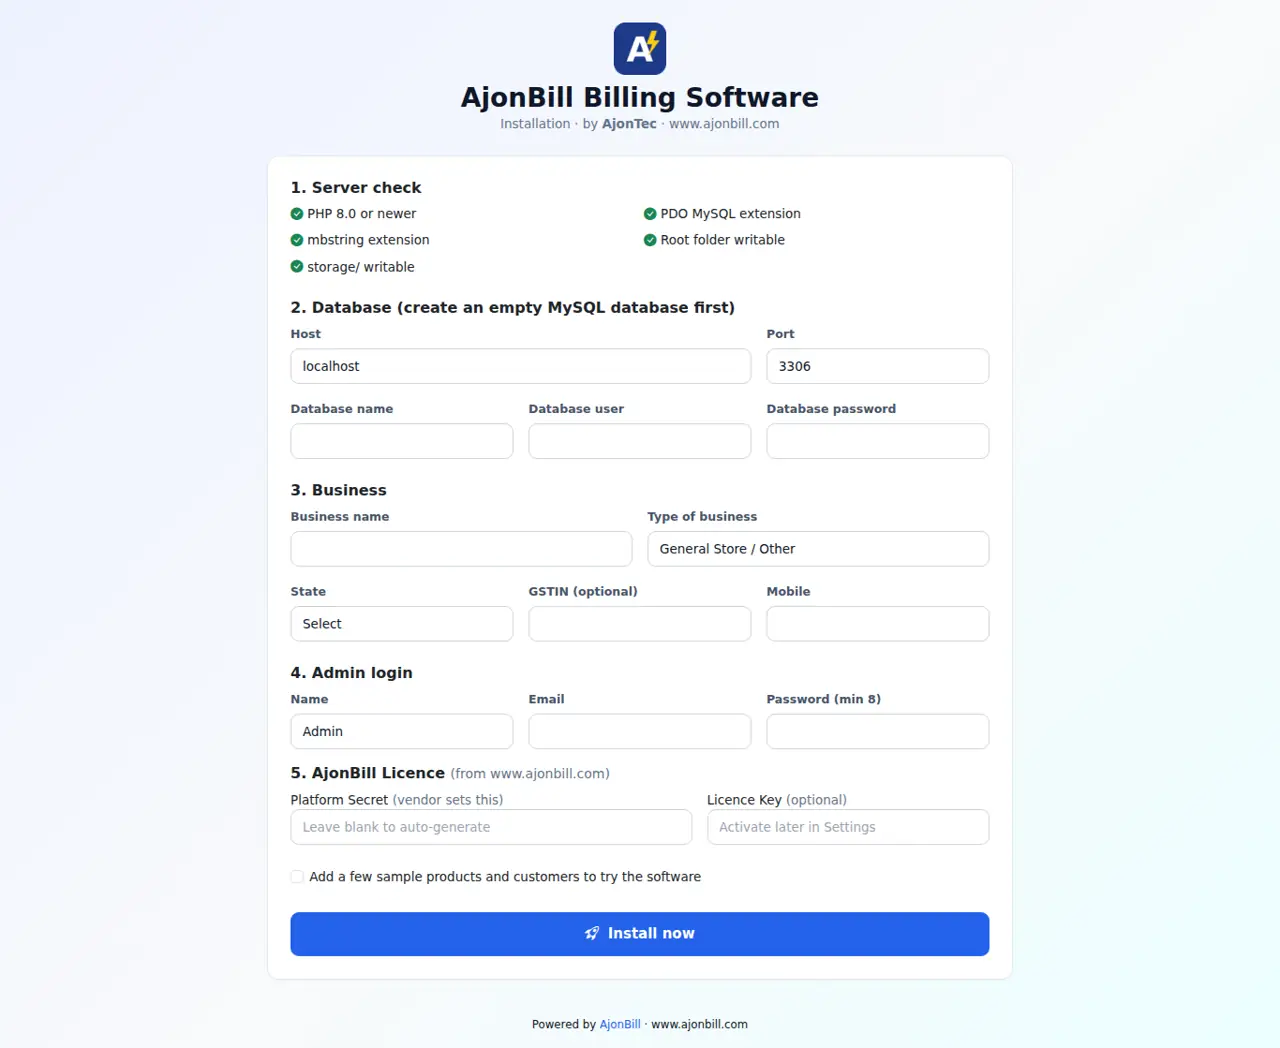
- Open your domain in the browser - the installer opens.
- Fill the database details, your business name, state, GSTIN (optional), the admin login and your licence code.
- Click Install. The software checks the licence, creates everything and opens the login page.
4. Windows offline app
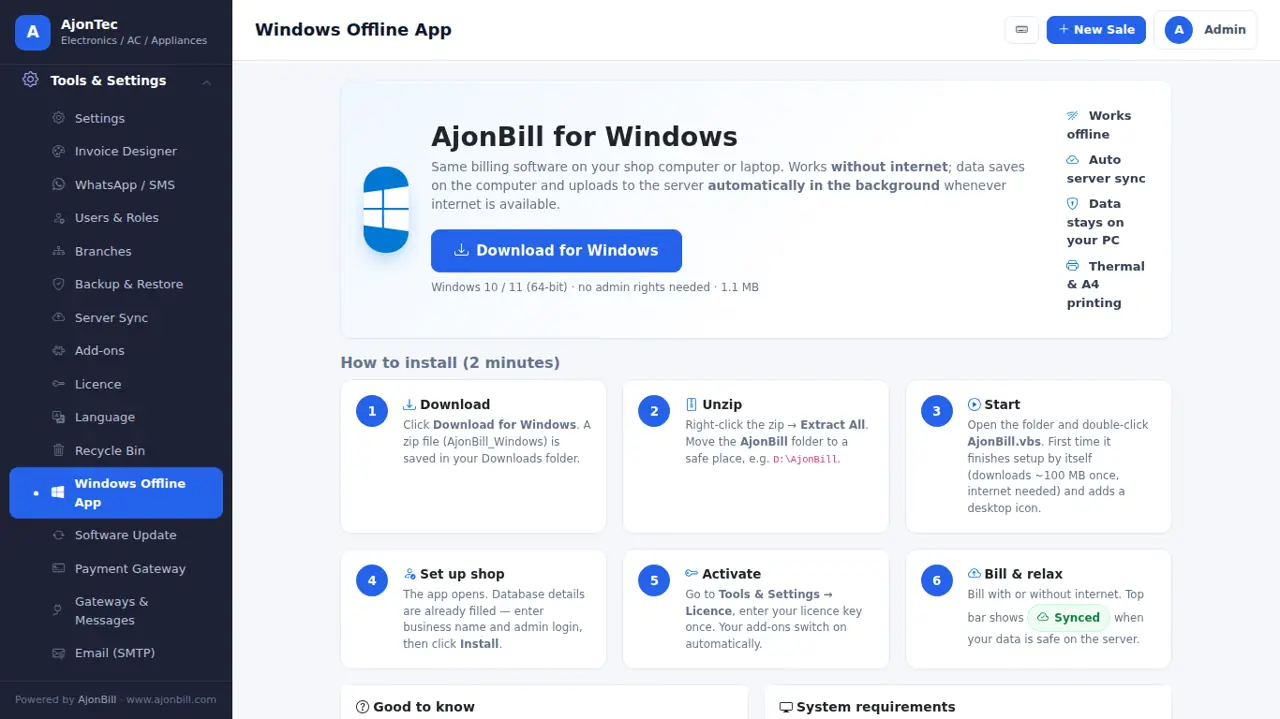
- My Account → My Software → download the Windows offline app → right-click → Extract All to Documents or Desktop.
- Double-click AjonBill.vbs. The first start downloads PHP and the local database by itself (internet needed once, about 100 MB) and makes a desktop icon.
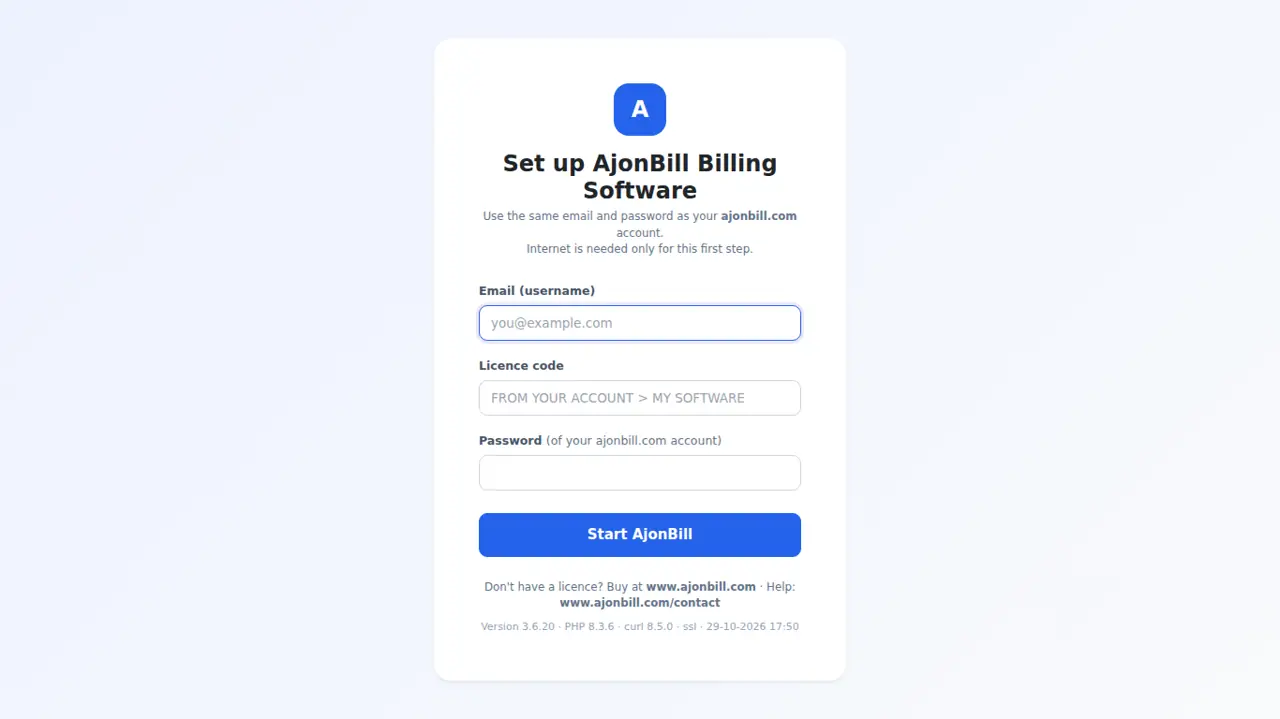
- Enter only your ajonbill.com email, licence code and password. No password yet, or forgotten? Click Email me a code - the password you typed becomes your account password.
- If you already use the website copy, every bill, product and customer comes to the computer and bill numbers continue.
- Works without internet for up to 90 days; data uploads to the server by itself when internet returns.
- Bring the website data again any time: Backup & Restore → Bring my data from website.
- New computer: My Account → My Software → Installations → Remove the old one, then set up the new one.
- Close fully with Stop-AjonBill.bat.
5. Login & dashboard
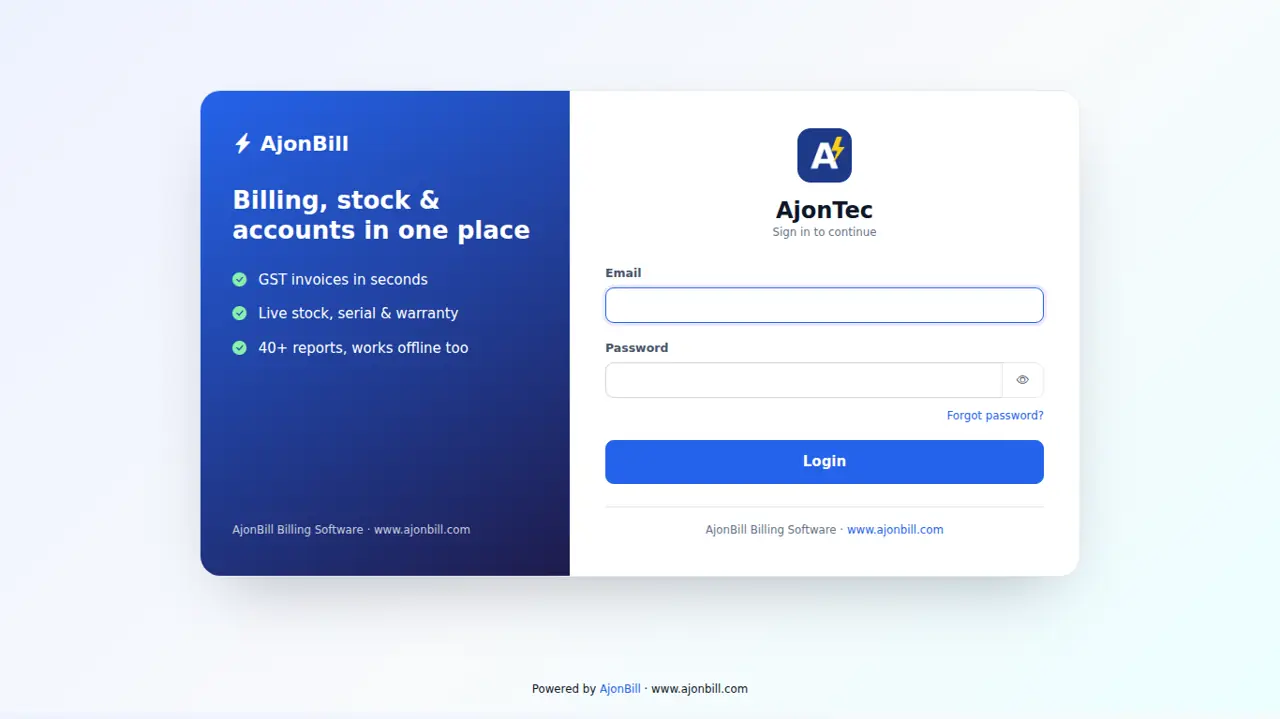
- Open your domain (or the desktop icon) → enter your email and password → Login. Turn on two-step login in Profile for extra safety.
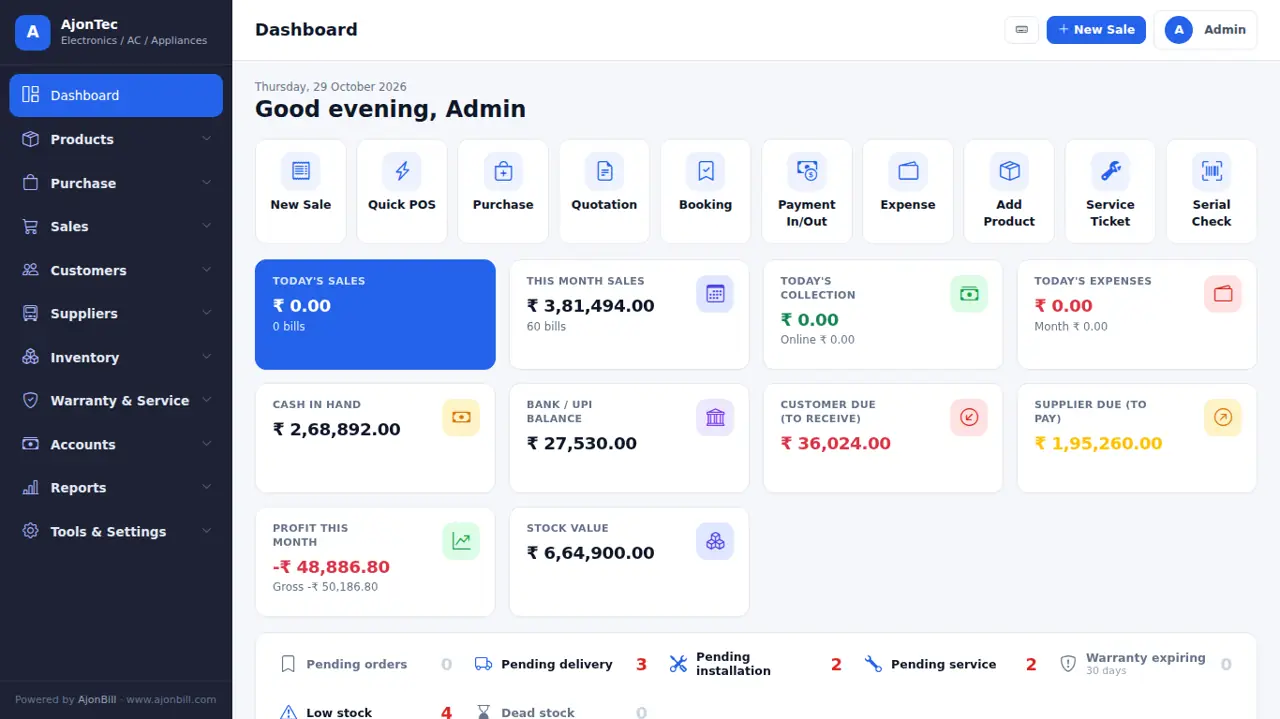
- The Dashboard shows today's sales, money received, customer dues, supplier dues, low stock and quick buttons.
6. Products & stock
6.1 Add a product
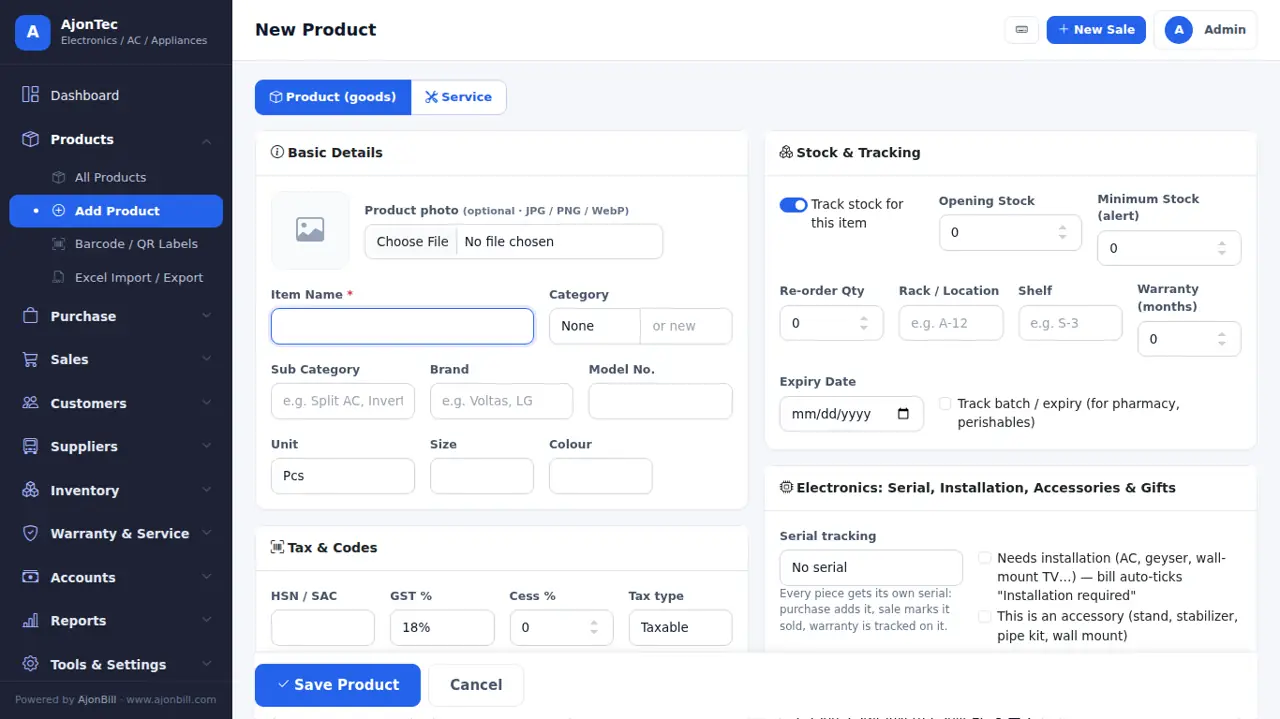
- Products → Add Product.
- Item name, category (pick or type a new one), unit, HSN and GST %.
- Prices: purchase, sale (retail), wholesale, dealer, offer and MRP. Tick Rates include GST if your prices already have GST.
- Stock: opening stock, minimum stock (low-stock alert), rack / shelf. Turn off Track stock for services or dishes.
- Optional: photo, barcode / SKU, brand & model and the business fields (see chapter 25).
- Save.
6.2 Change stock
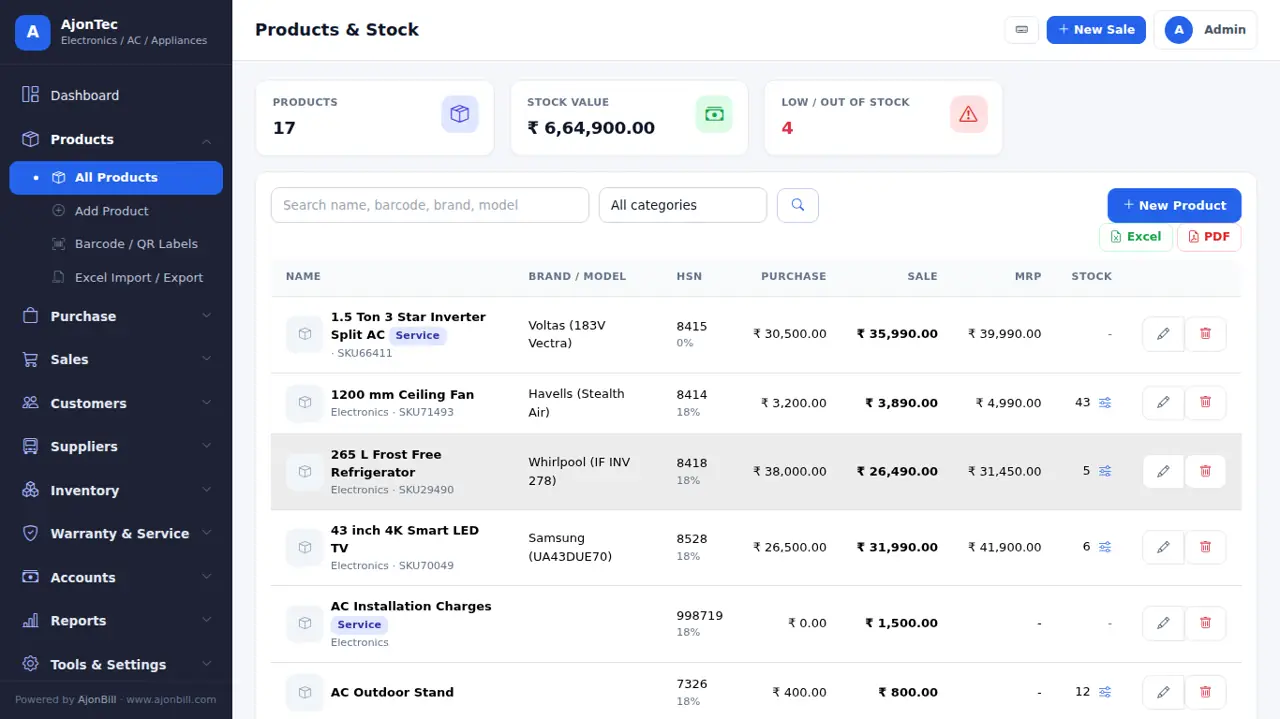
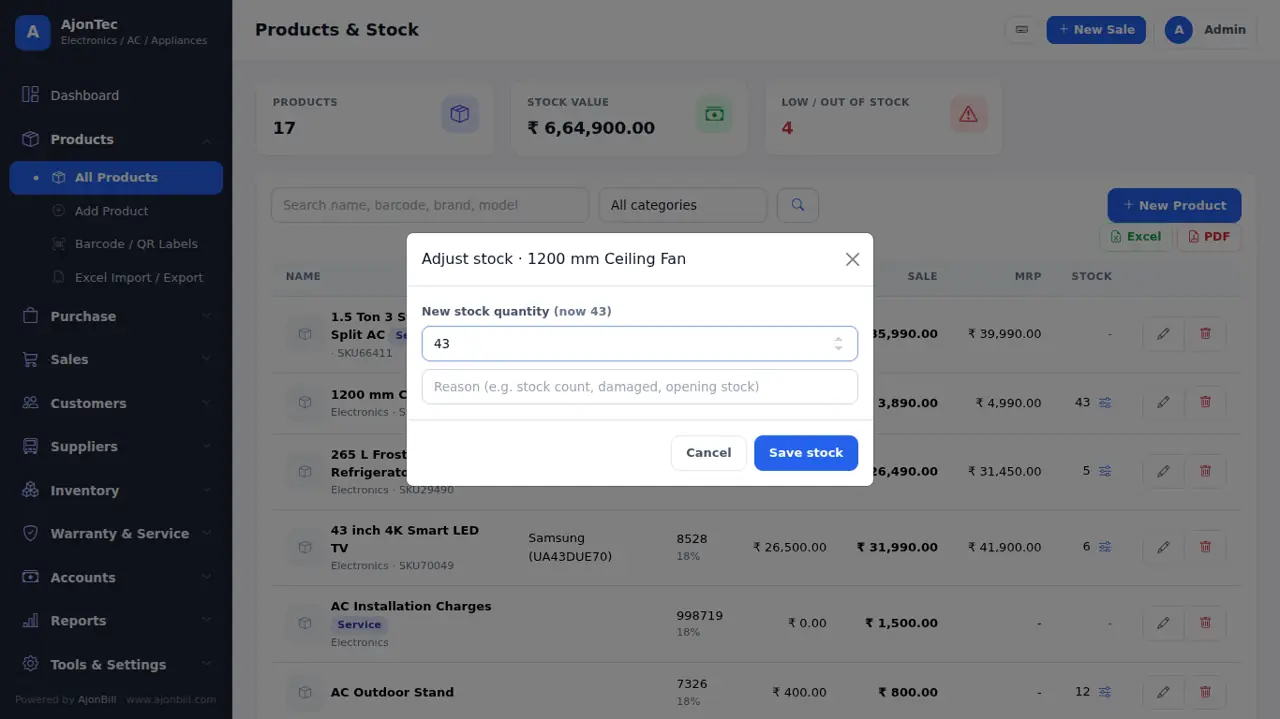
Click the slider icon next to the stock → type the new quantity and a reason → Save stock. Every change is kept in the stock history.
6.3 Barcode labels, Excel import and live stock
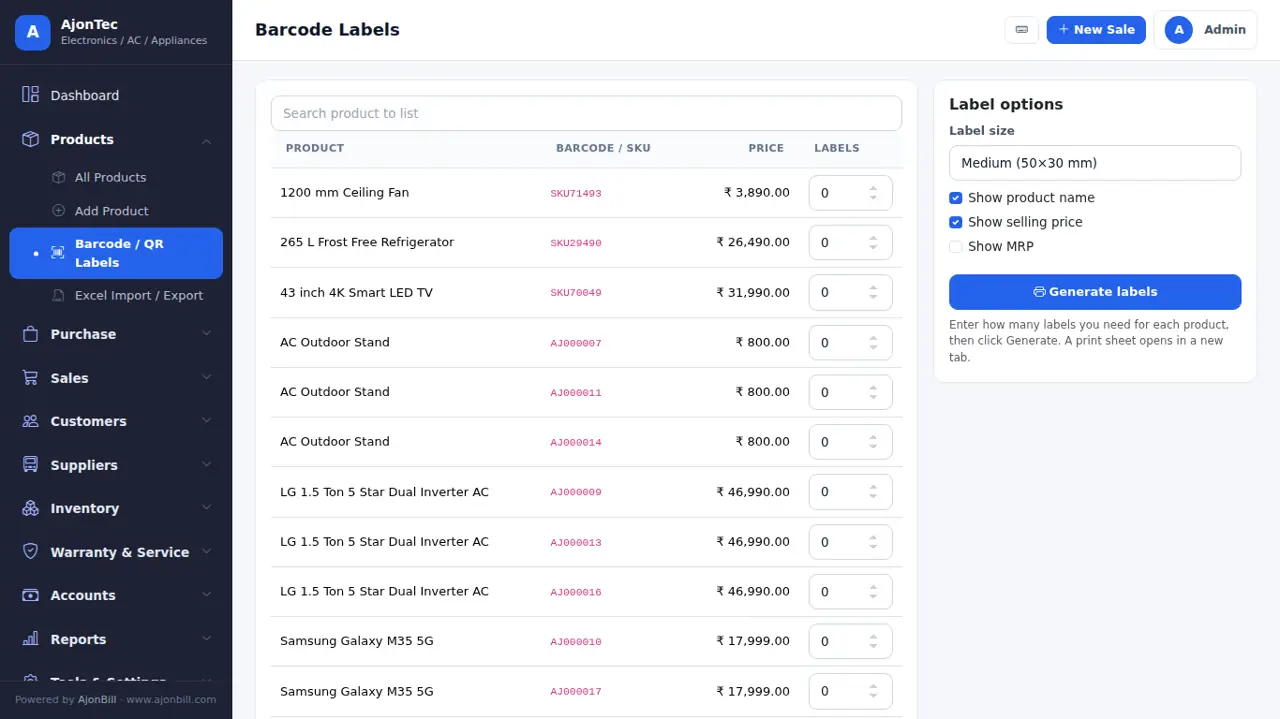
- Products → Barcode / QR Labels: choose items and copies → print on A4 sheets or a label printer.
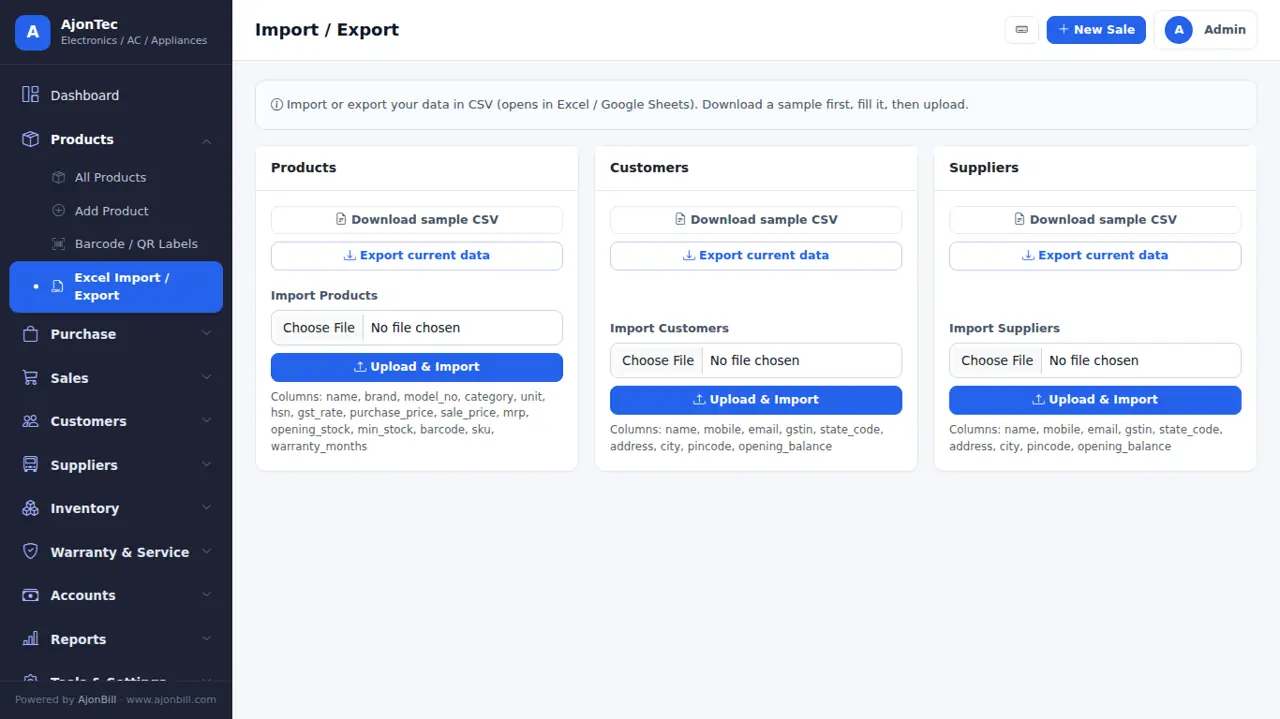
- Products → Excel Import / Export: download the sample file, fill it, upload. Existing items are updated, new ones are added.
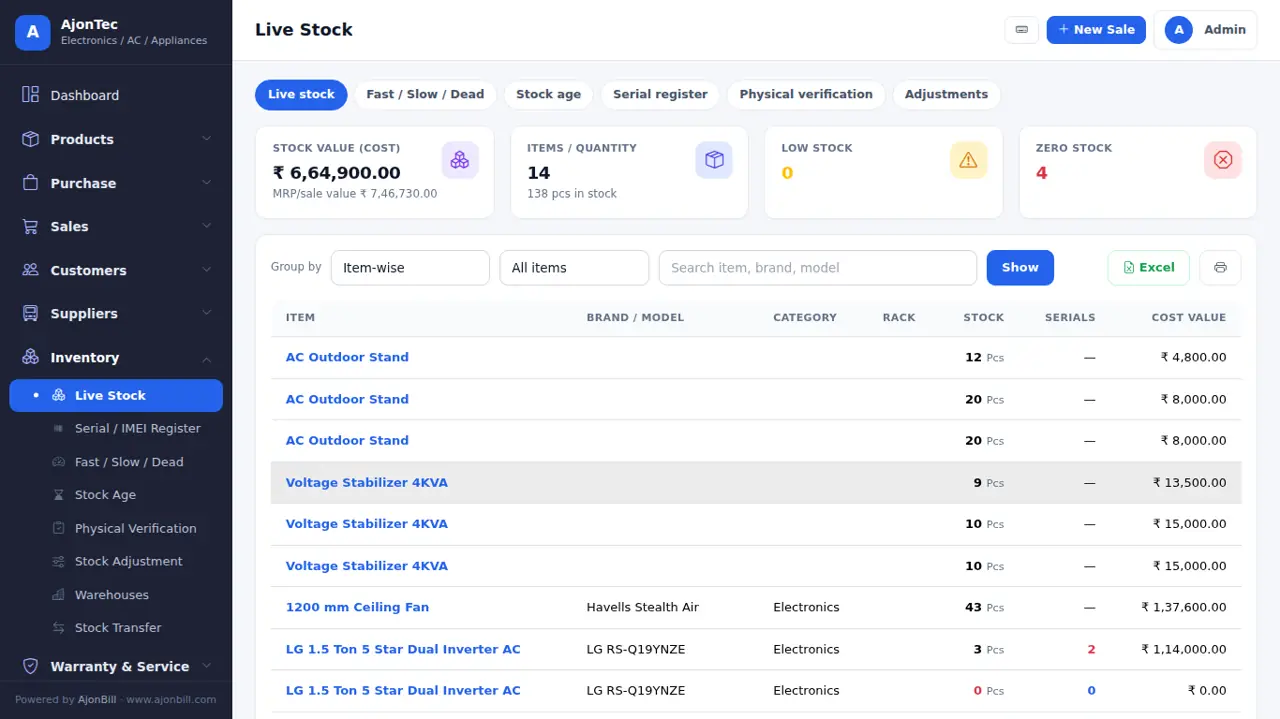
- Inventory → Live Stock: stock and value branch-wise, low and dead stock.
7. Purchase (stock in)
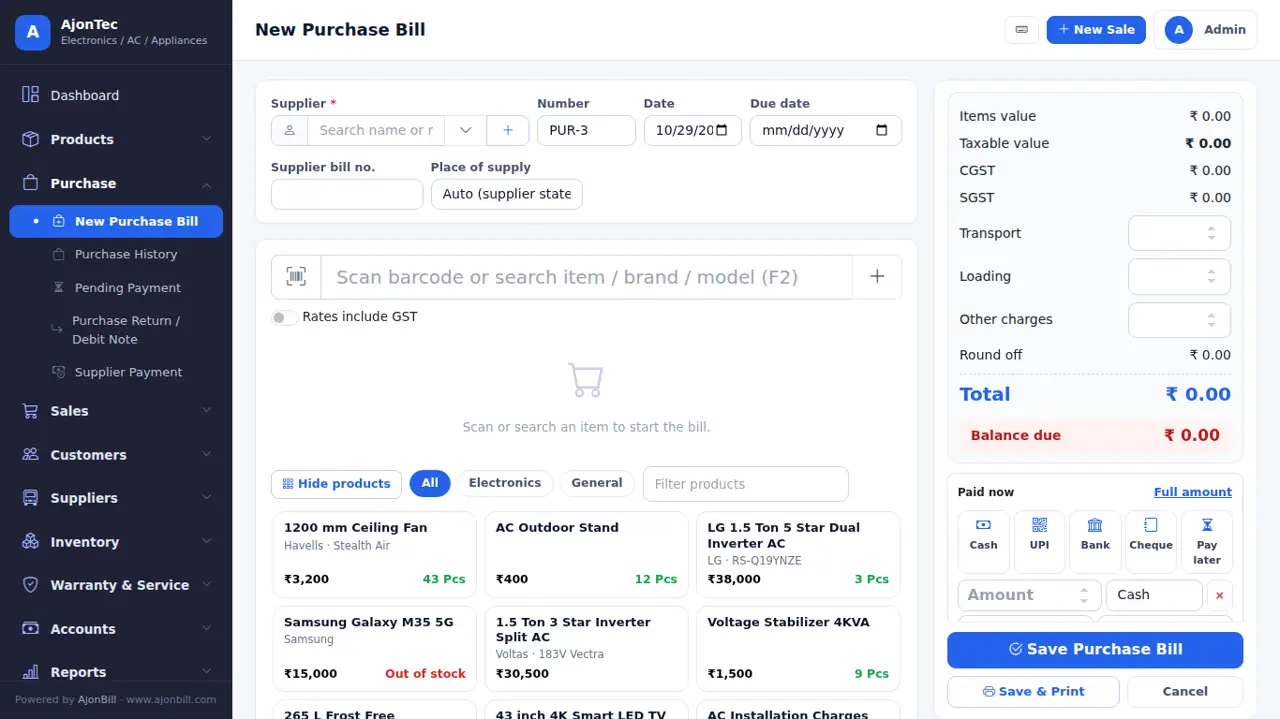
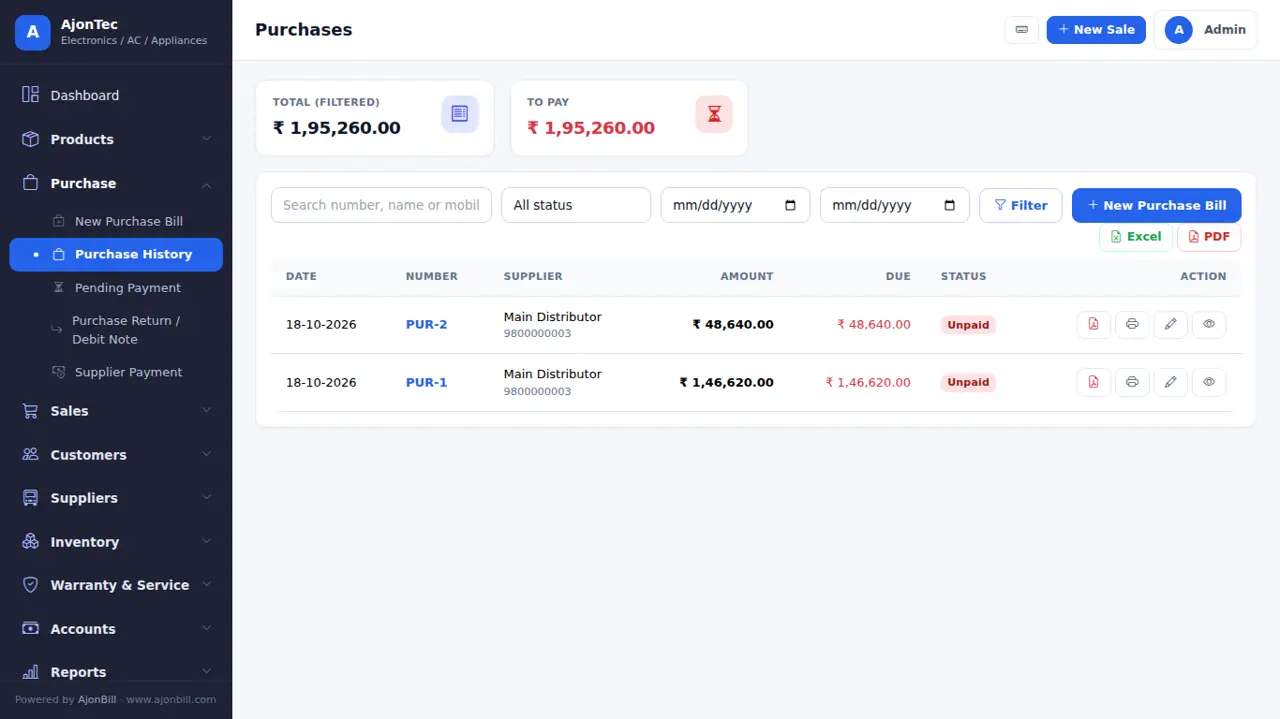
- Purchase → New Purchase.
- Pick the supplier (or + to add), the supplier bill number and date.
- Add items: search or scan, quantity, purchase rate, GST. Serial / IMEI or batch & expiry where needed.
- Add transport / loading charges if any, then the amount paid now (cash, UPI, bank...).
- Save - stock goes up and the supplier balance updates.
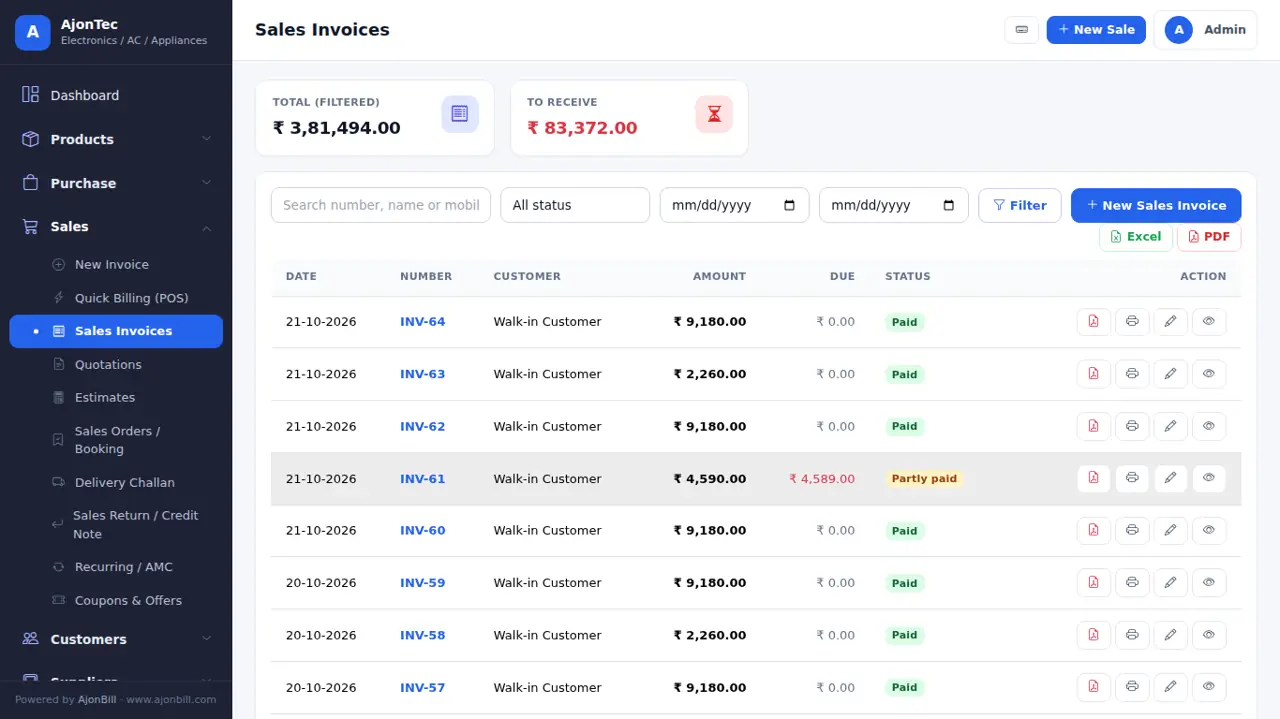
8. Sales invoice
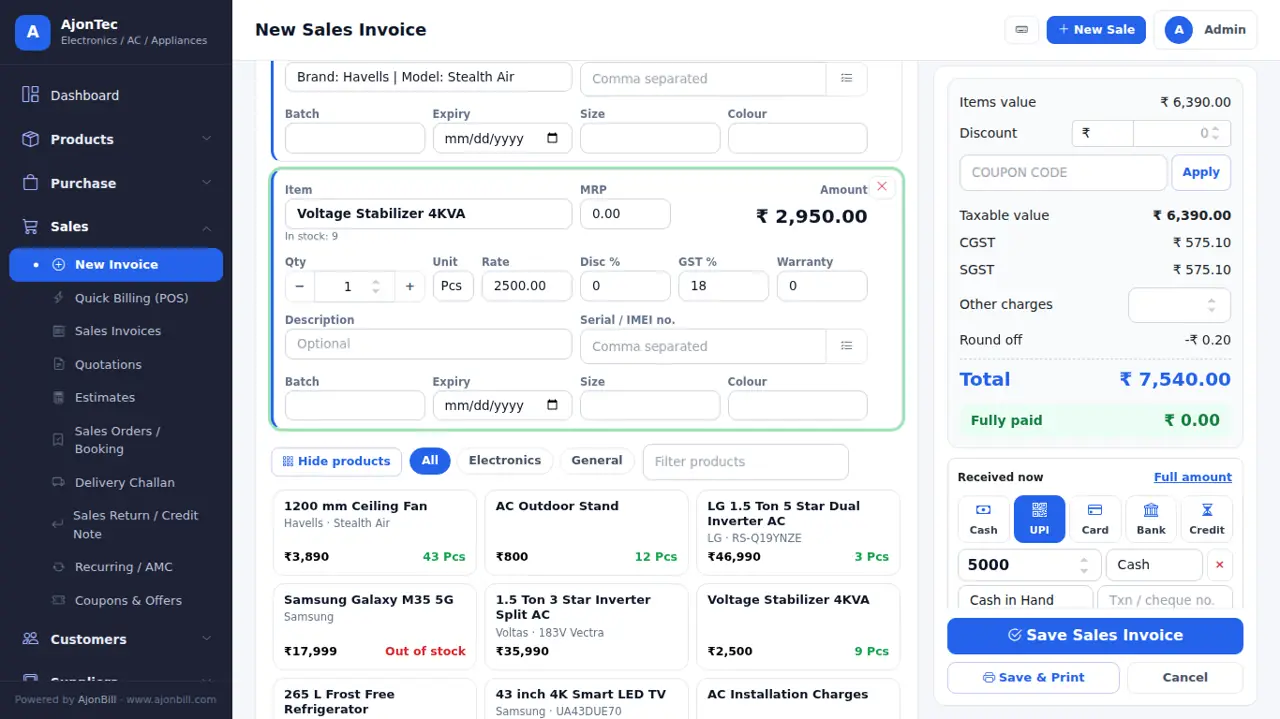
- Sales → New Invoice (or the blue New Sale button).
- Customer: Walk-in Customer is ready; click the box or ▾ to pick, or + to add a new customer. Old dues show under the name.
- Bill format, salesman, place of supply, GST / Non-GST and sale type (Cash / Credit; EMI, Finance and Exchange with the add-on).
- Add items: scan, type in the search (F2) or tap a product tile. Each item has 3 lines: name & amount · qty − / +, unit, rate, discount %, GST %, warranty · description and serial / IMEI.
- An item with no stock shows a warning and is not added (unless Allow negative stock is on in Settings).
- Discount: ₹ amount (exactly that much comes off the total) or %; coupon codes work too.
- Received now: tap Cash / UPI / Card / Bank; for a split payment type the first amount, then tap the next mode - the balance goes there. Balance due is shown under the total.
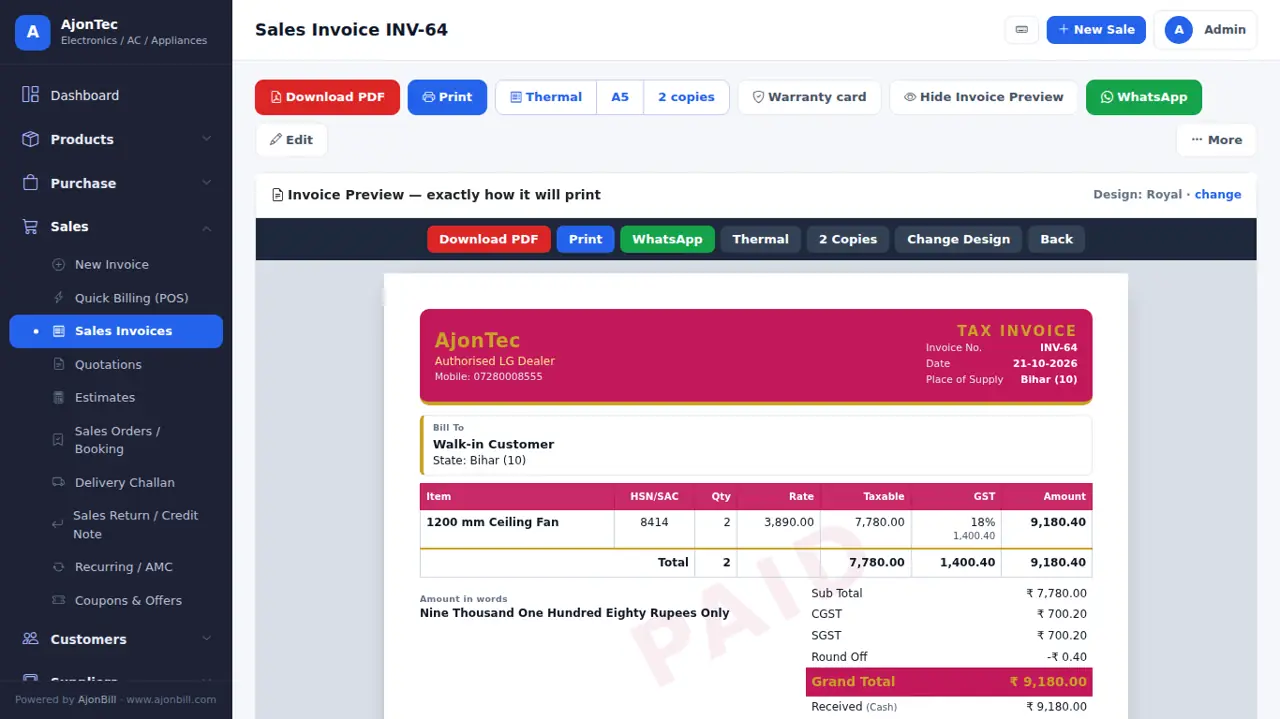
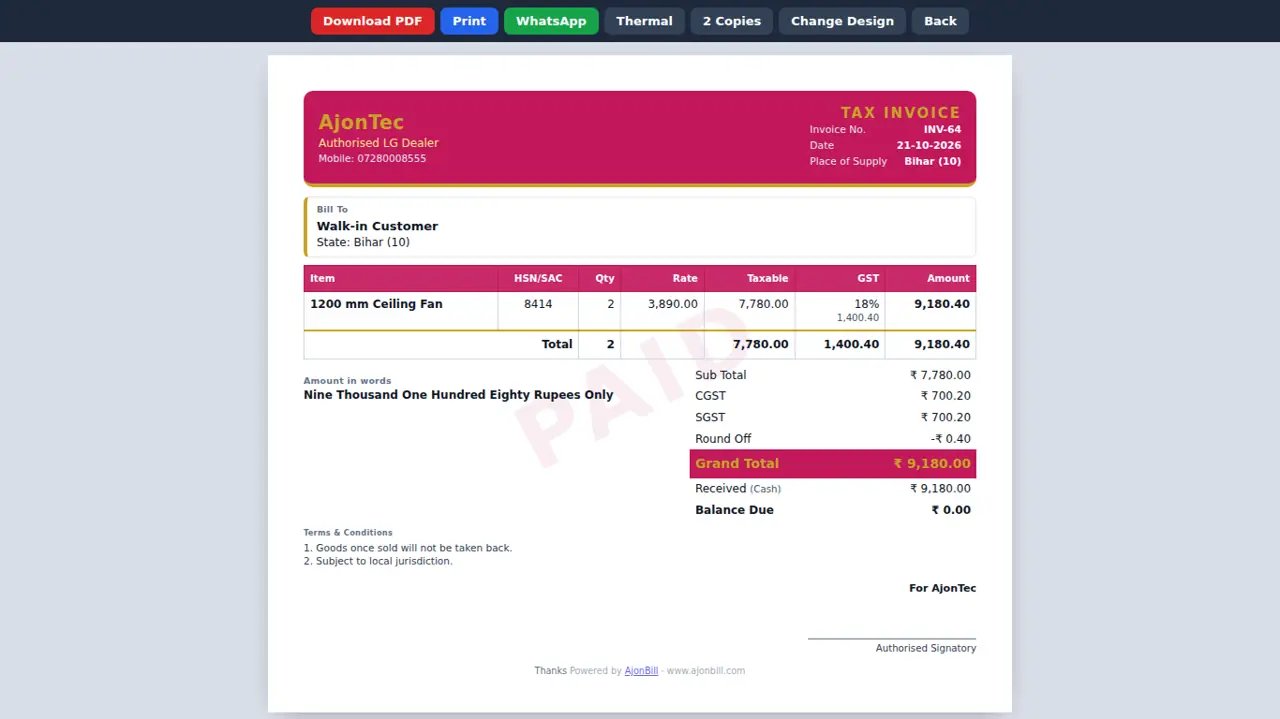
- Save or Save & Print. The bill opens in your invoice design - print, PDF, WhatsApp or thermal.
9. Quick Billing (POS)
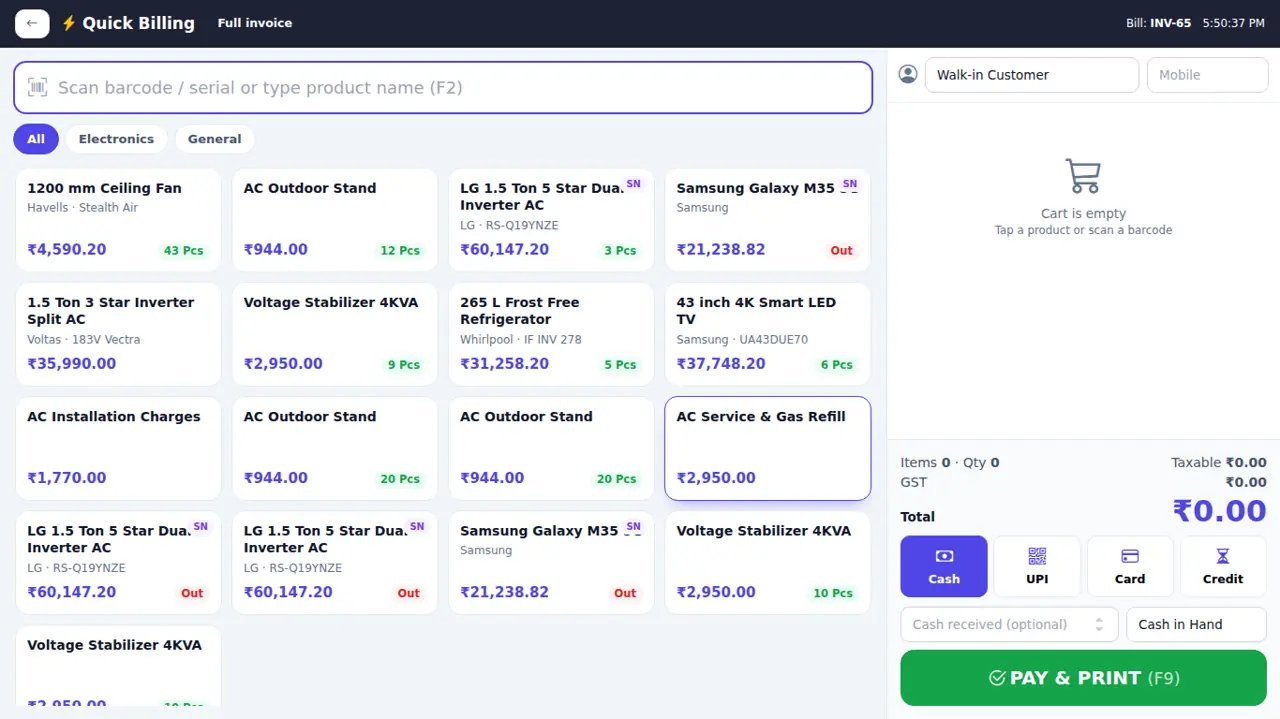
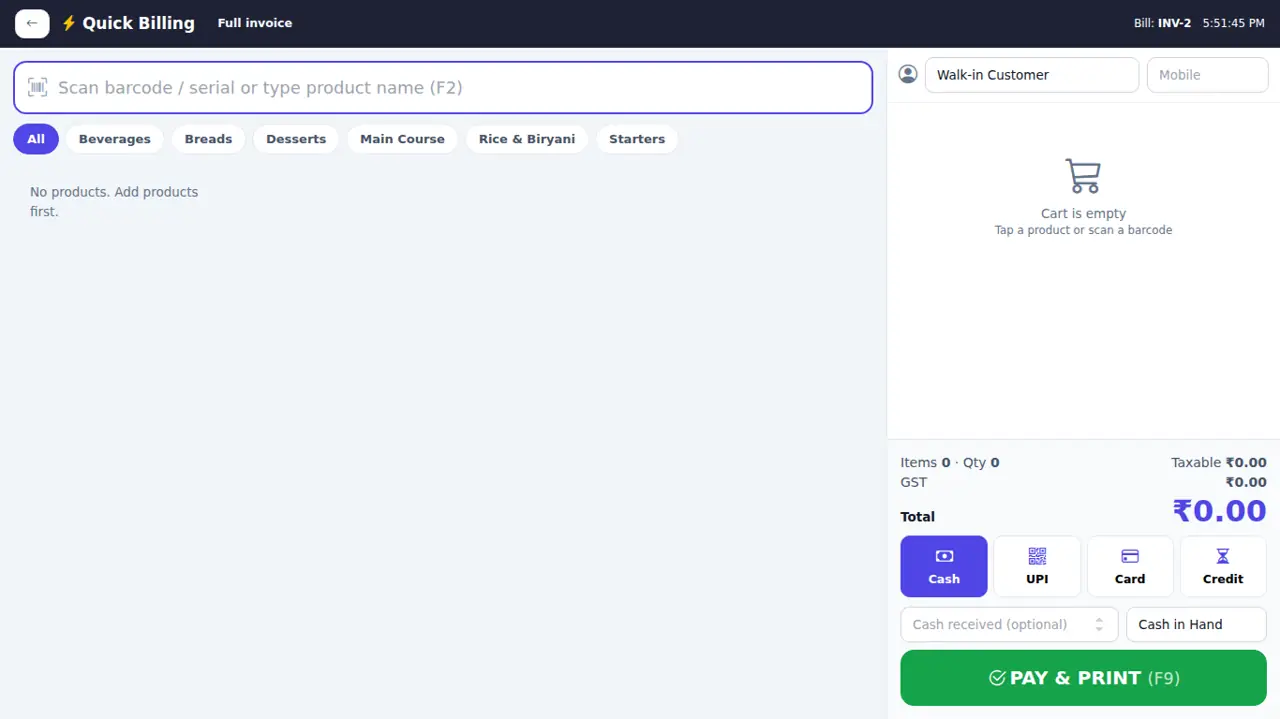
- Sales → Quick Billing (POS).
- Tap tiles or scan barcodes; change qty with − / +.
- Choose the payment mode, type the amount received - the change to return is shown.
- Pay & print - prints on the thermal printer.
10. Quotation, estimate, delivery challan and sales order
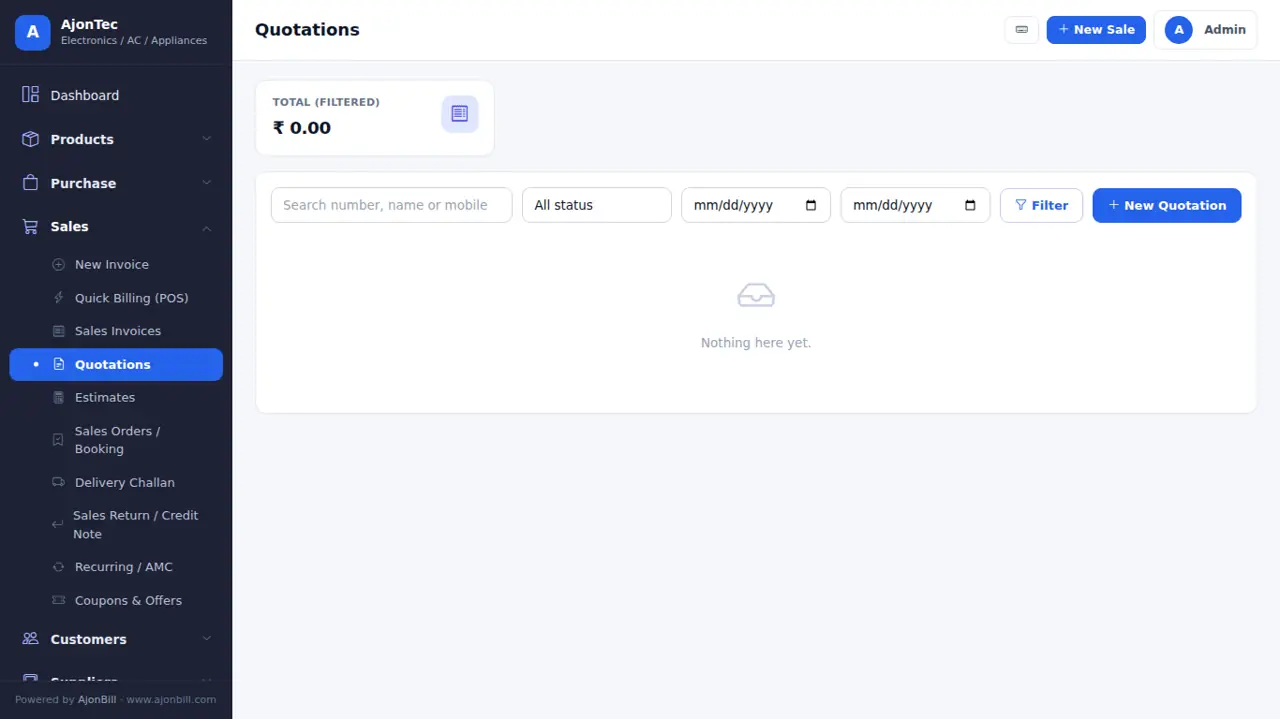
- Quotations / Estimates: same screen as the invoice; stock does not change. Convert to an invoice in one click.
- Delivery Challan: goods leave without a tax invoice; convert to an invoice later.
- Sales Orders / Booking (add-on): take an advance now, deliver and bill later.
11. Returns (credit / debit notes)
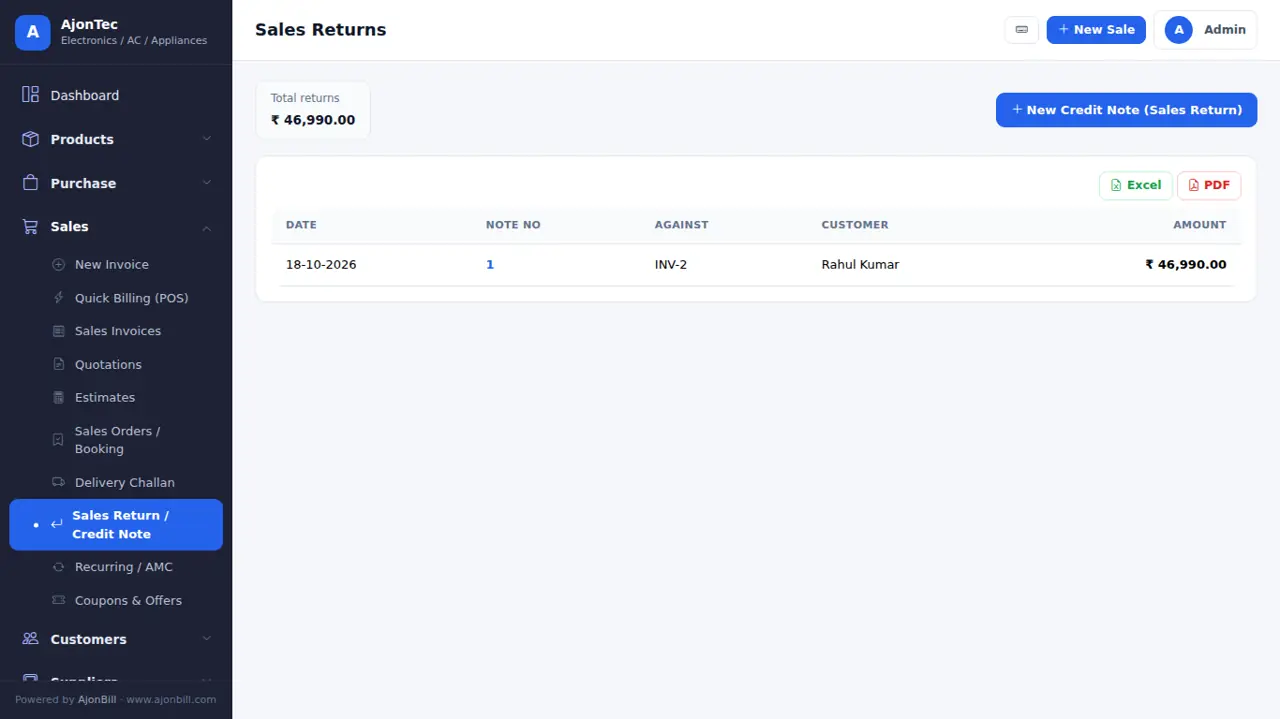
- Sales → Sales Return / Credit Note → pick the invoice → choose items and qty → refund or keep as credit.
- Stock comes back and the customer balance updates. Purchase returns work the same from Purchase.
12. Customers & suppliers
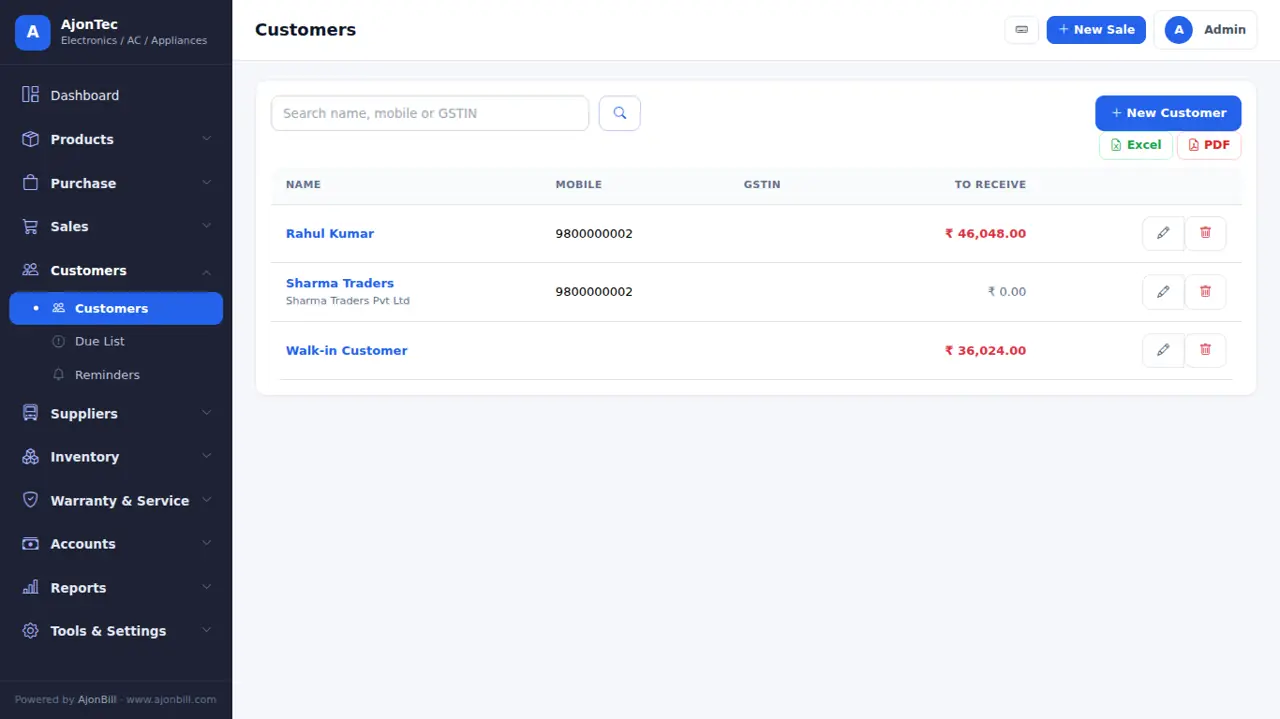
- Customers → All Customers → Add: name, mobile, GSTIN, state, address, opening balance and credit limit.
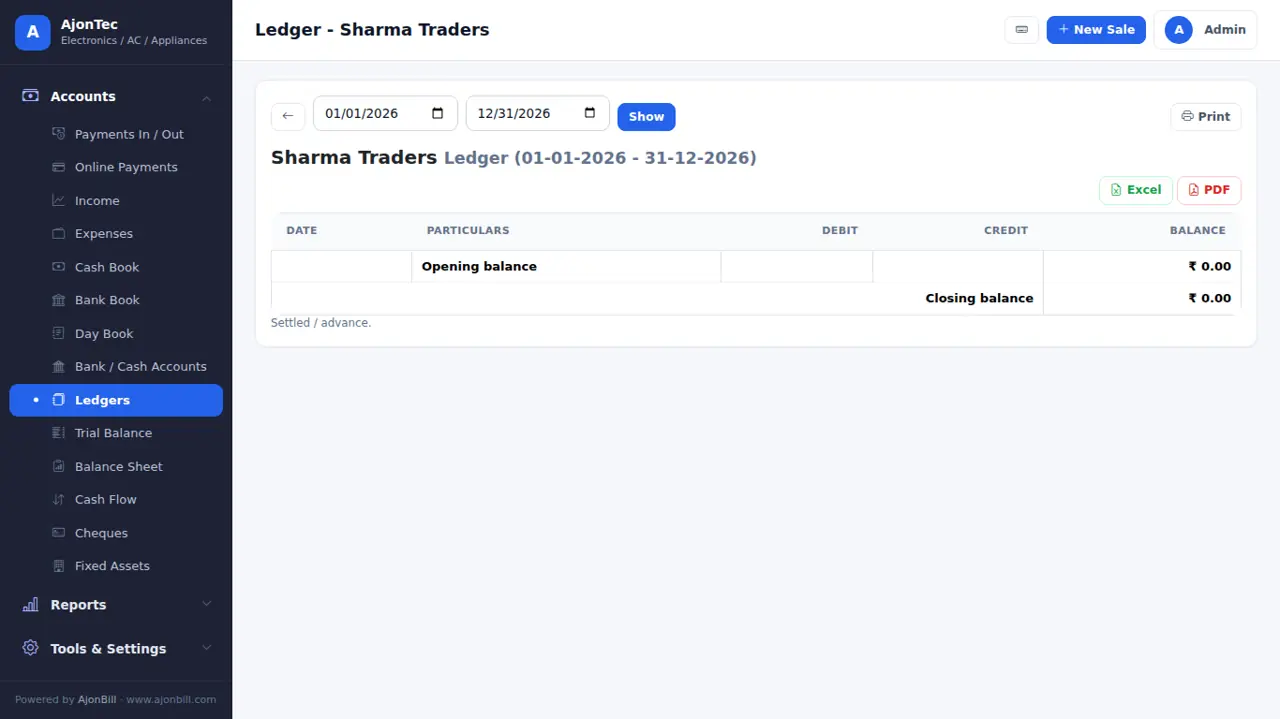
- Click a name for its ledger: every bill, return and payment with the running balance.
13. Payments, dues & reminders
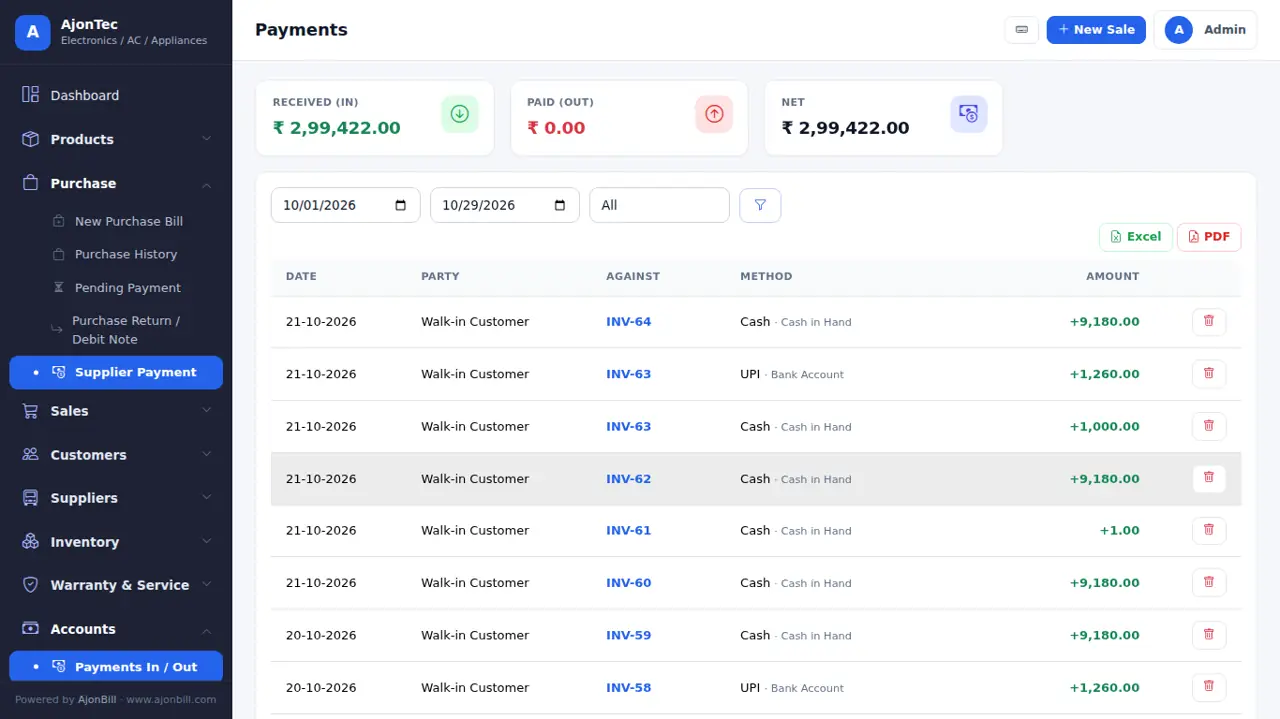
- Accounts → Payments: receive money against bills or on account (advance / old dues).
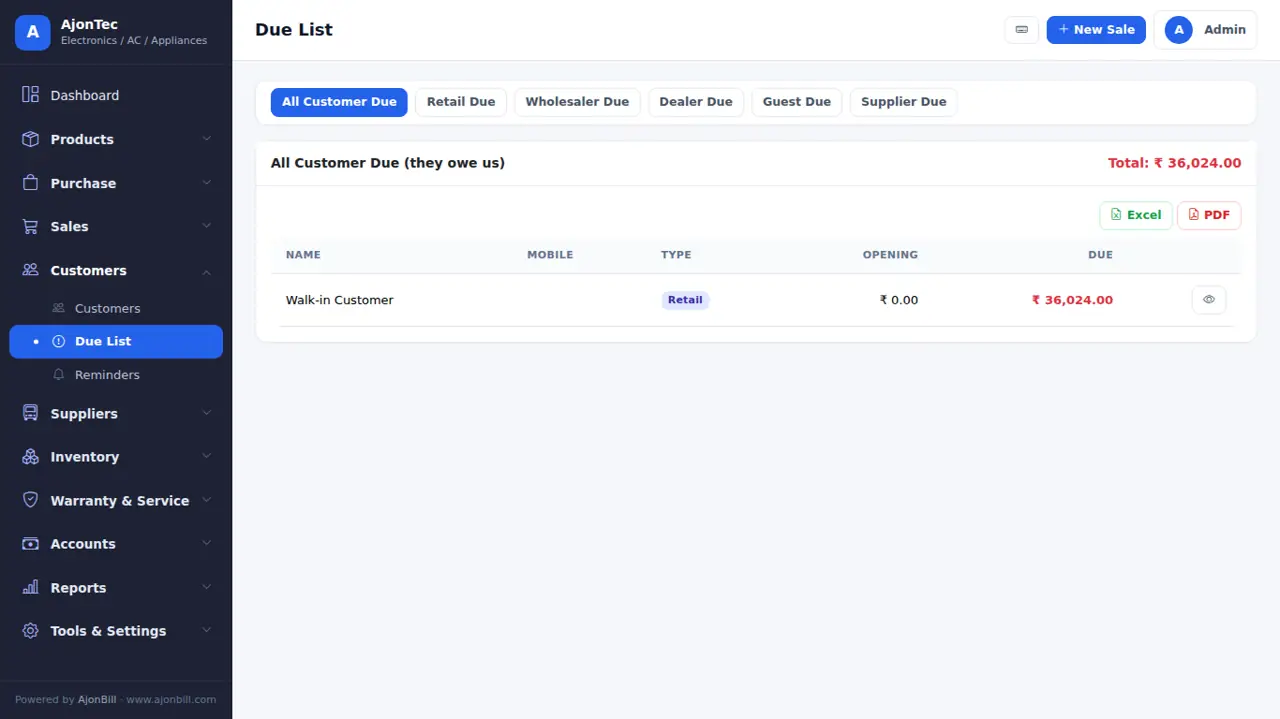
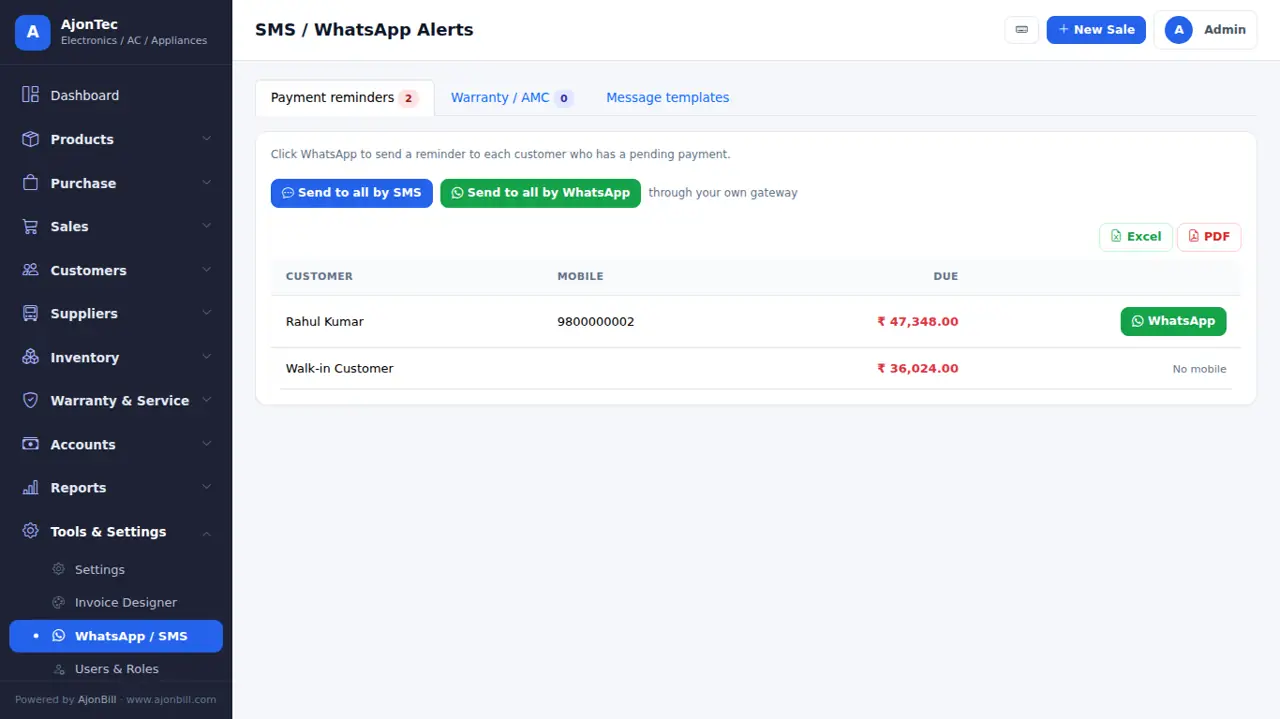
- Due list: who owes you and whom you owe - exactly the ledger balance. Send reminders (SMS / WhatsApp add-on).
14. Expenses & accounts
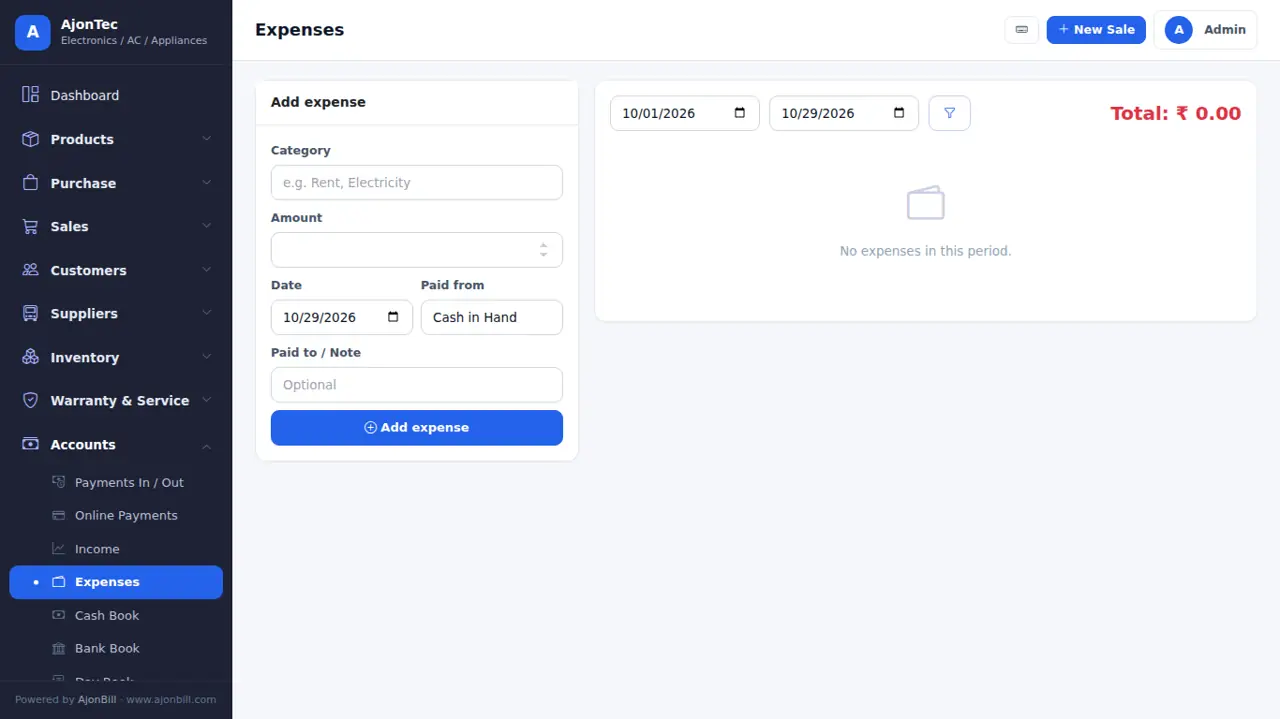
- Expenses: rent, salary, electricity... by category, paid from cash or bank.
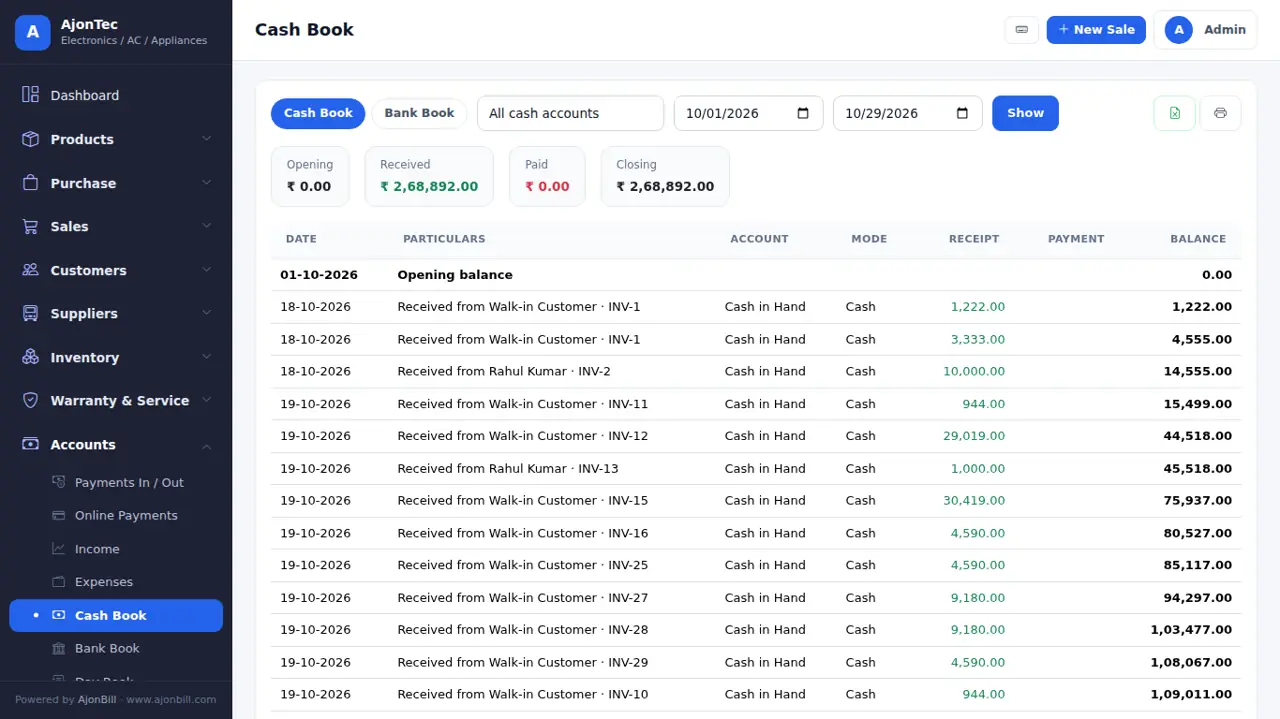
- Cash / Bank book, Day book, cheques, fixed assets, trial balance, P&L and balance sheet.
15. Reports & GST returns
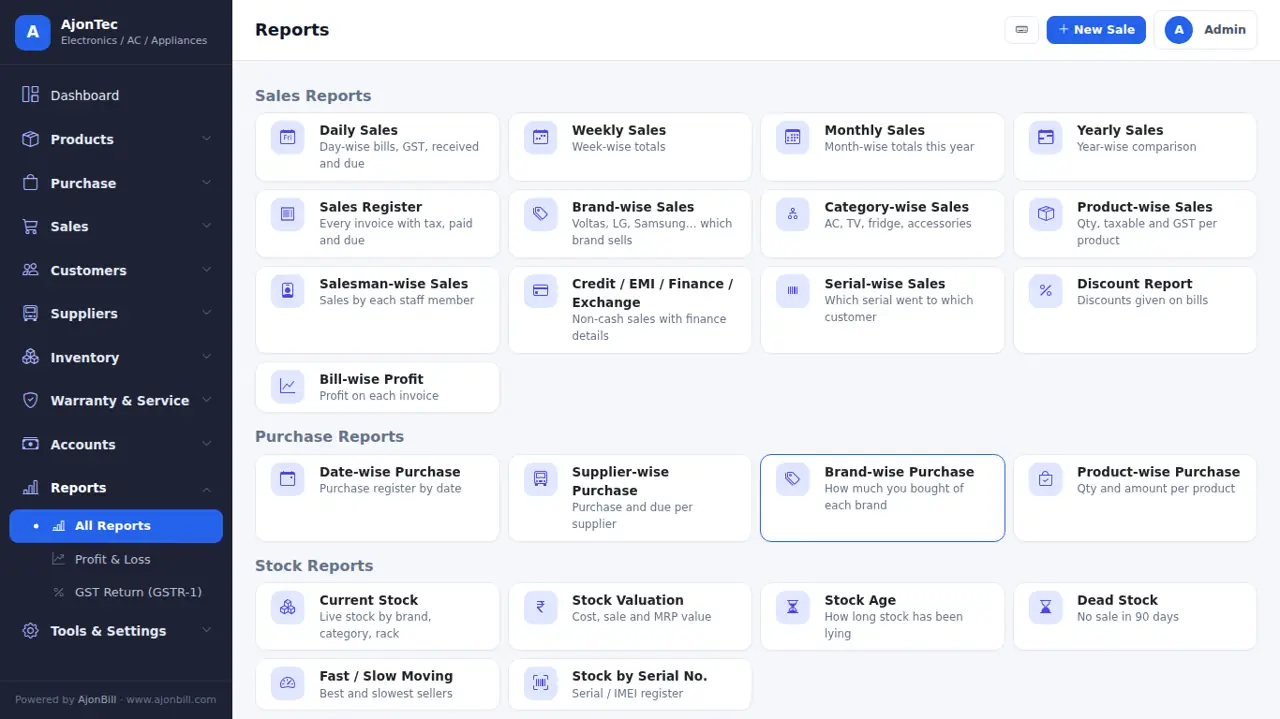
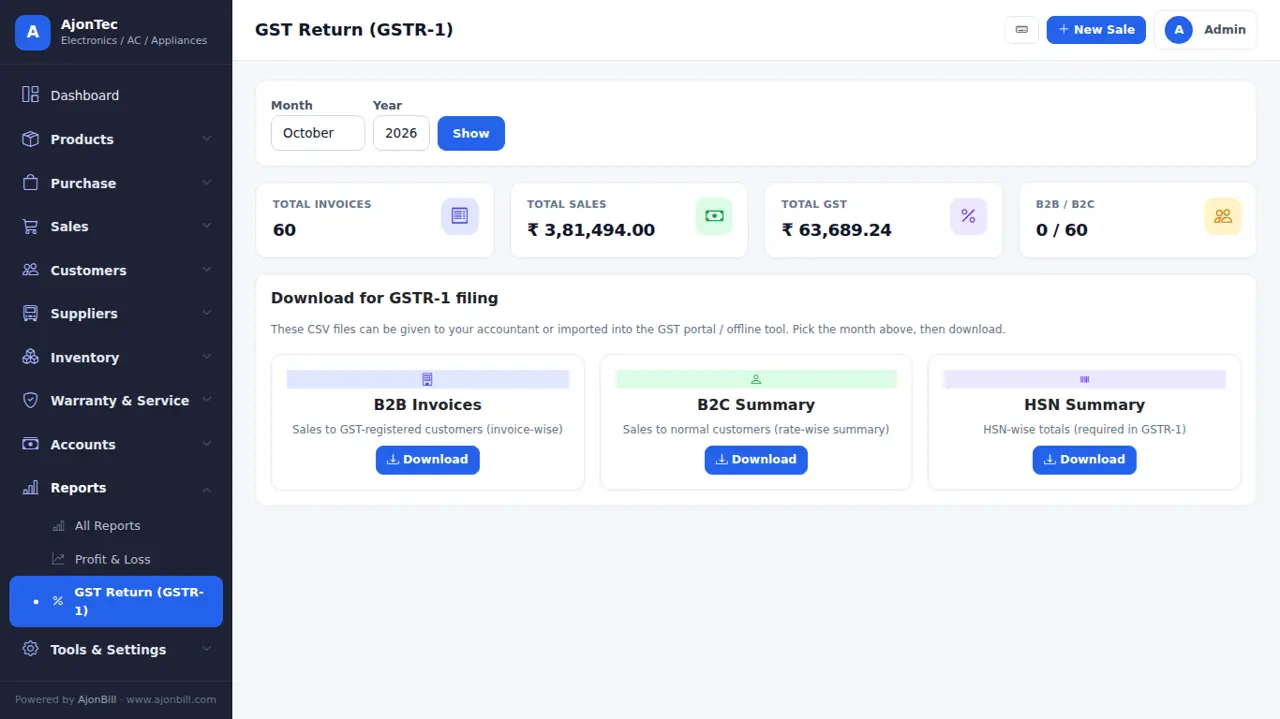
- Reports: sales, purchase, item-wise, party-wise, profit, stock, expiry, day book and more (40+), each with date filter, Excel and PDF.
- GST Return: GSTR-1 (B2B, B2C, HSN) and GSTR-3B figures for the month - download JSON / Excel for your CA or the GST portal.
16. Invoice designer
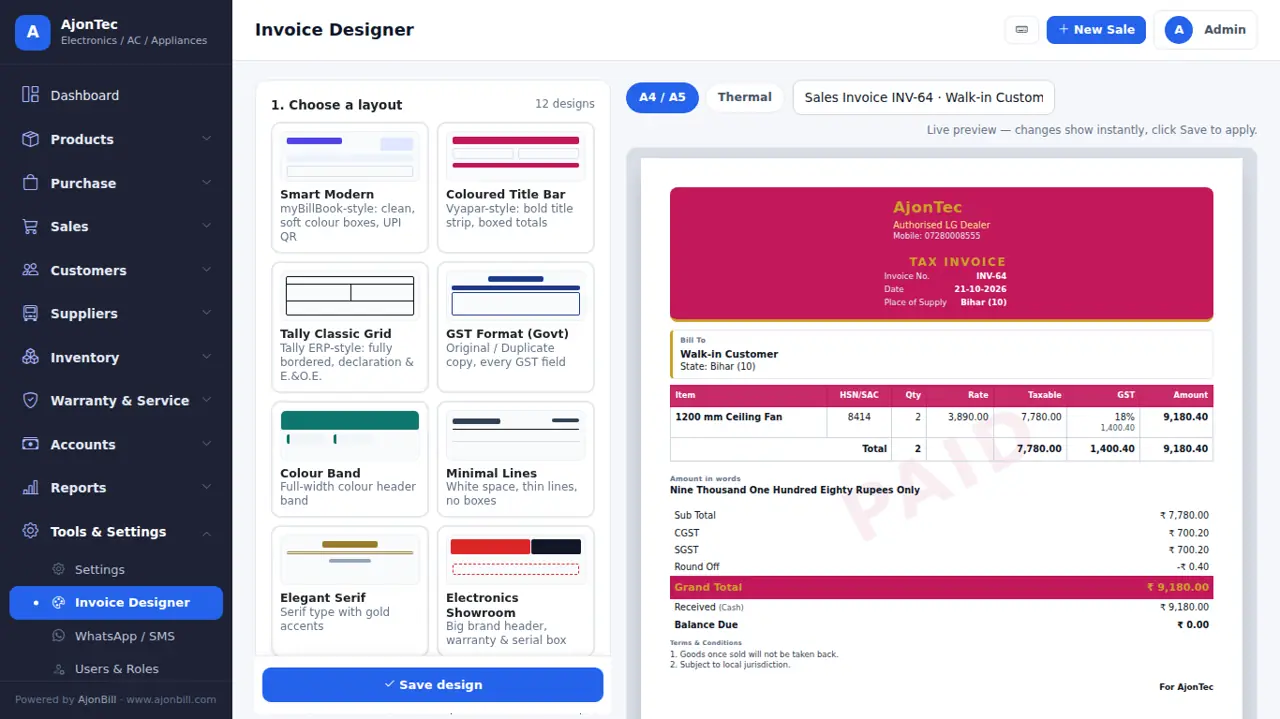
- Tools & Settings → Invoice Designer.
- Choose one of 12 layouts, colour, font, paper (A4 / A5 / thermal), copies and watermark.
- Switch fields on / off (logo, HSN, discount column, bank, UPI QR, signature...) - empty columns disappear by themselves. The live preview shows a sample bill even before your first sale.
- Save design.
17. Settings
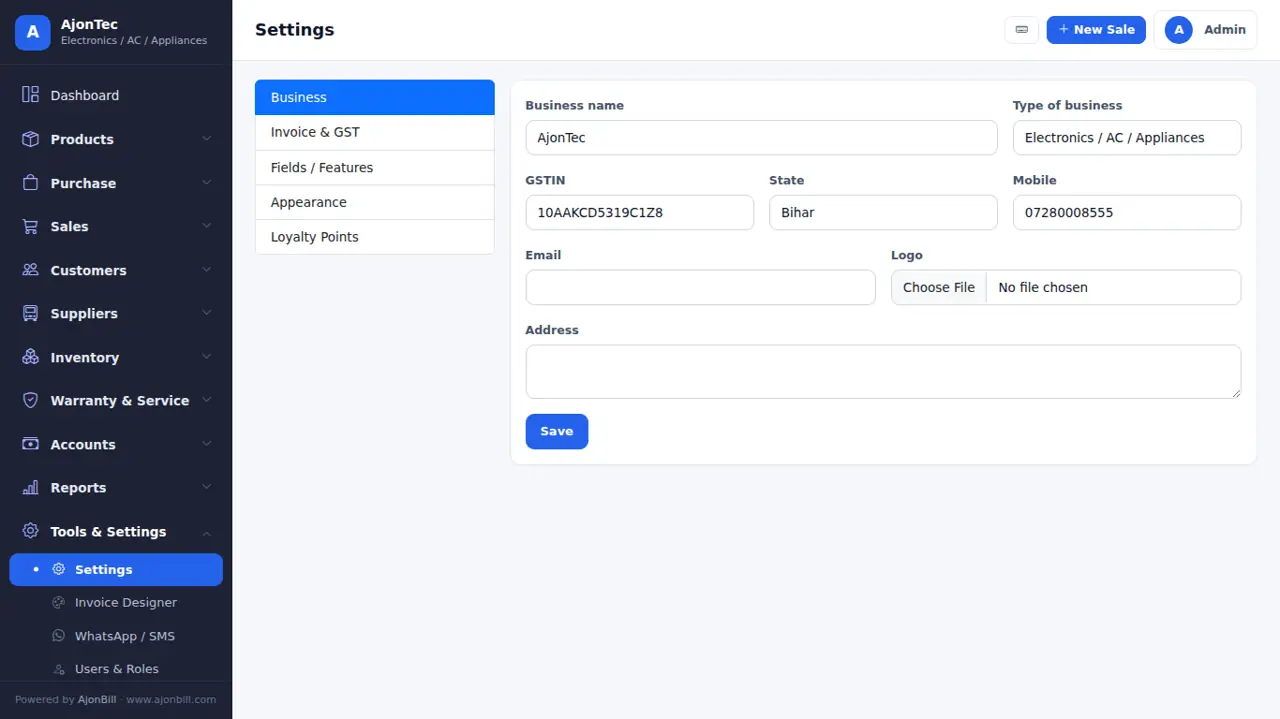
- Business name, address, GSTIN, logo, bank and UPI details, bill numbers (prefix and next number), terms, features for your business, negative stock, round-off and language.
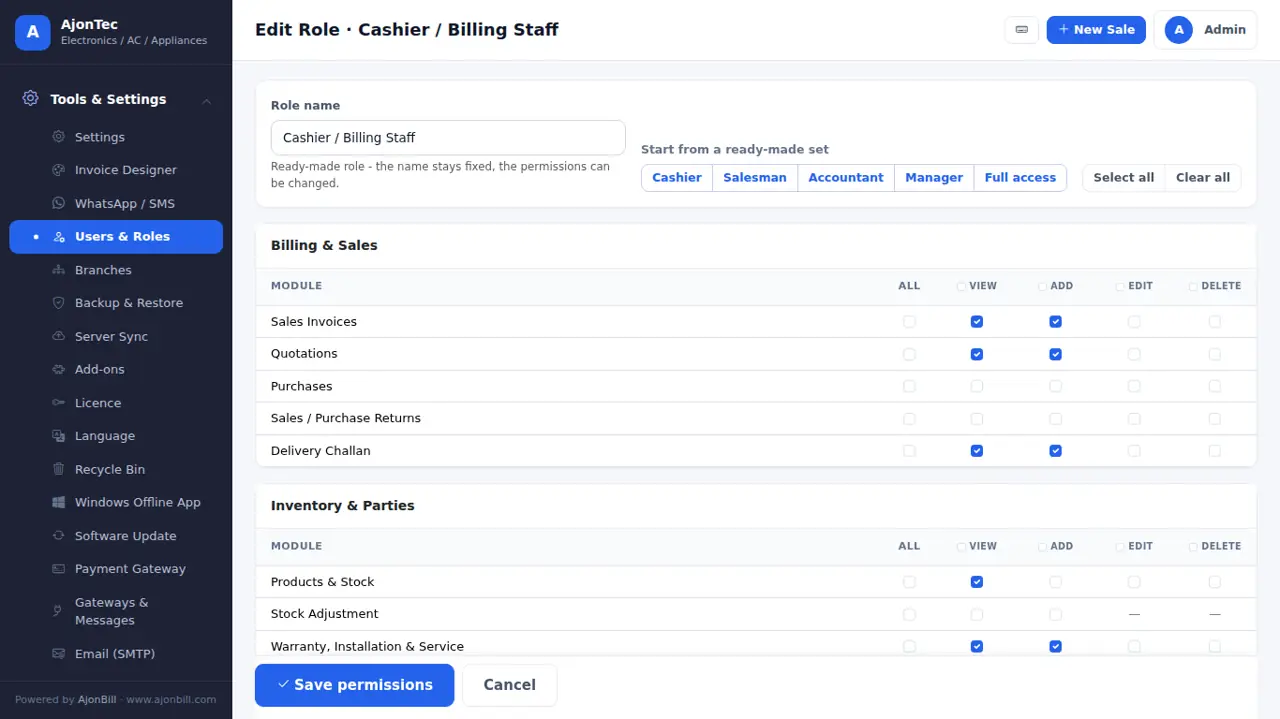
18. Users & roles
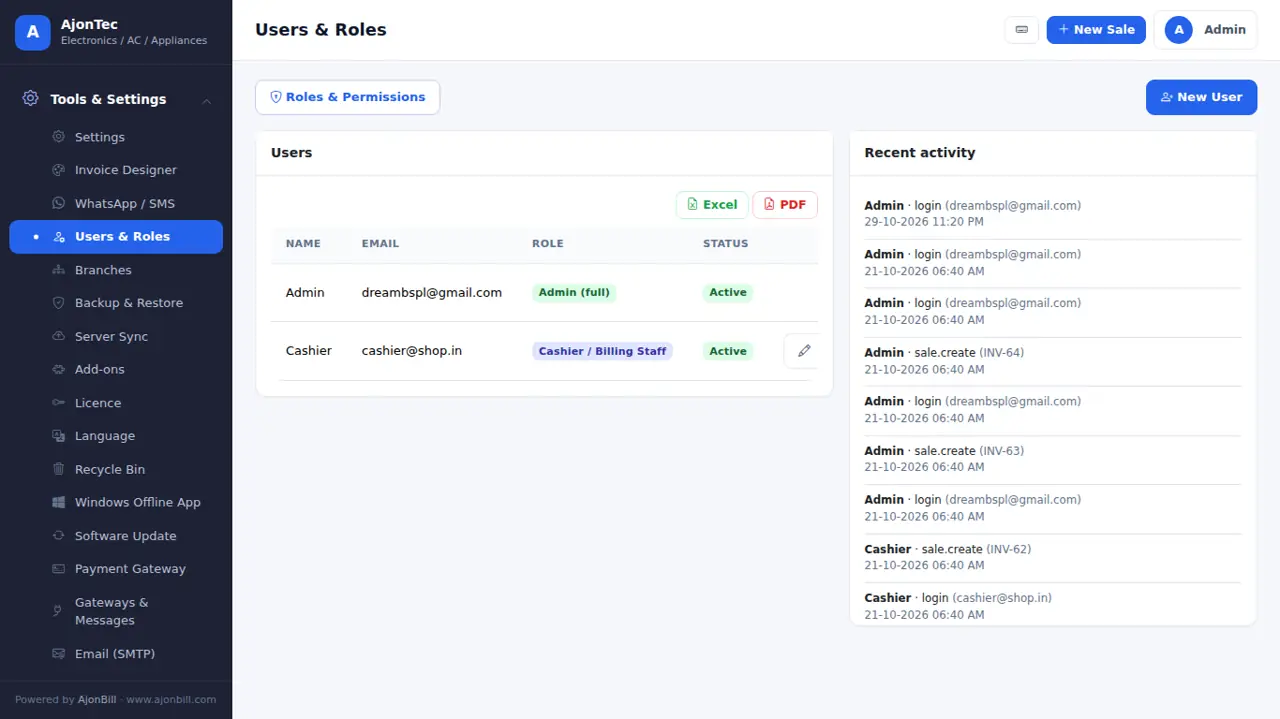
- Tools & Settings → Users & Roles → Add user with email, password and role.
- Open a role: start from Cashier, Salesman, Accountant or Manager, then tick View / Add / Edit / Delete per module.
- Billing controls: change item rate, give discount, see purchase price & profit.
19. Backup, restore & fresh start
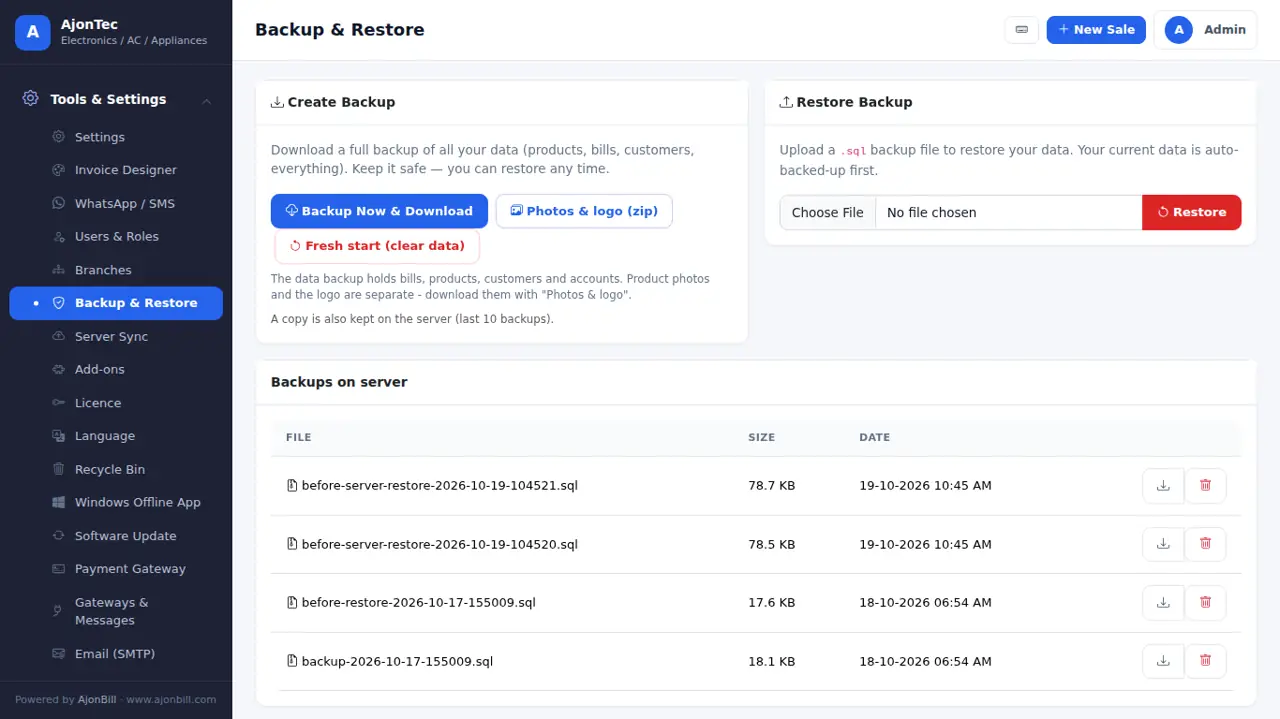
- Backup Now & Download (all data) and Photos & logo (zip) - keep both every week. Restore from a backup file.
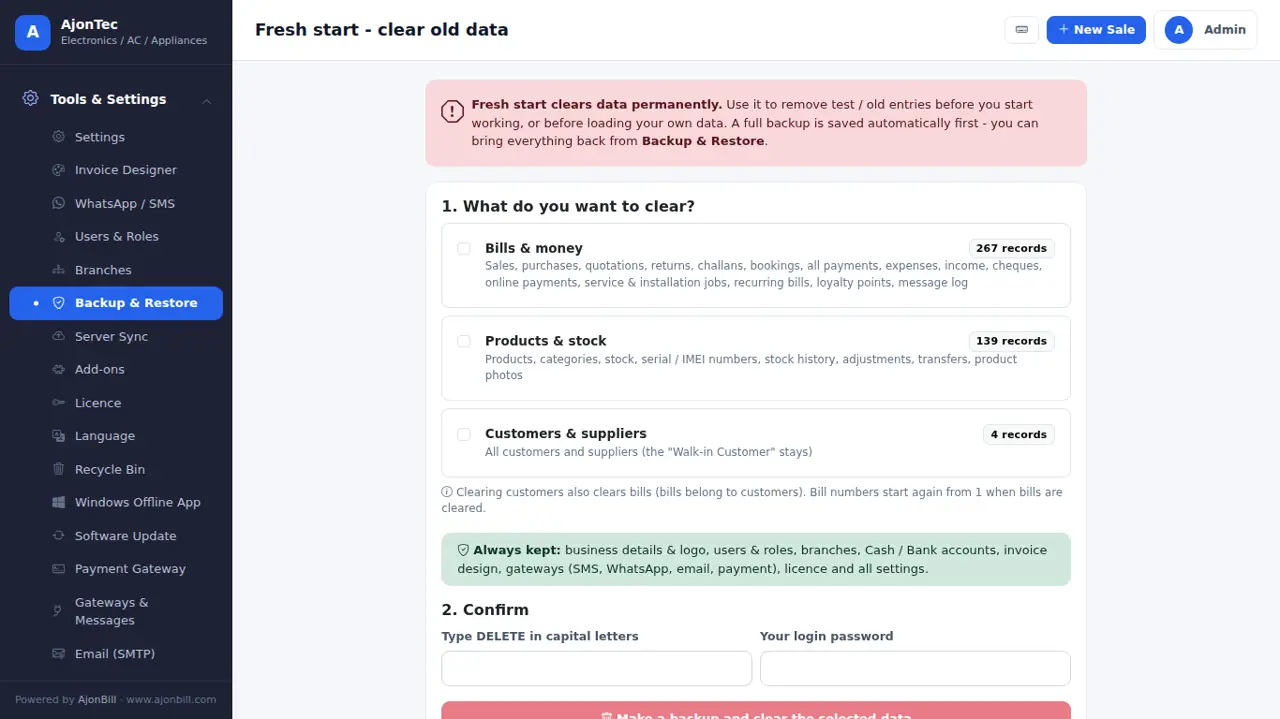
- Fresh start (admin): clear old bills, products or customers before you begin. Business details, users and settings stay; a full backup is made first.
20. Server sync
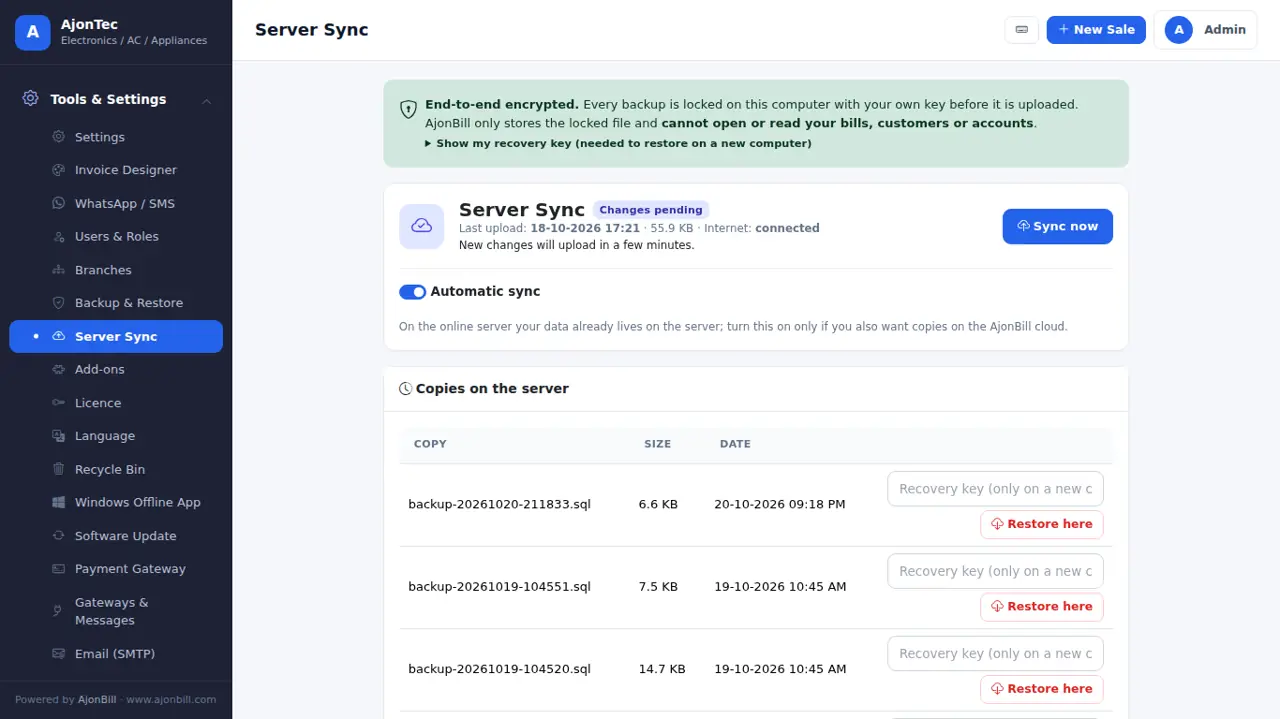
Tools & Settings → Server Sync: your data is encrypted on your computer and uploaded to the AjonBill server automatically. Keep the Recovery Key safe - only you can open the backup.
21. Software update
- When a new version is out you see a note and get an email.
- Tools & Settings → Software Update → Check → Install update now. A backup is made first; your data, settings and design stay.
- Press Ctrl+F5 after the update. See What's new.
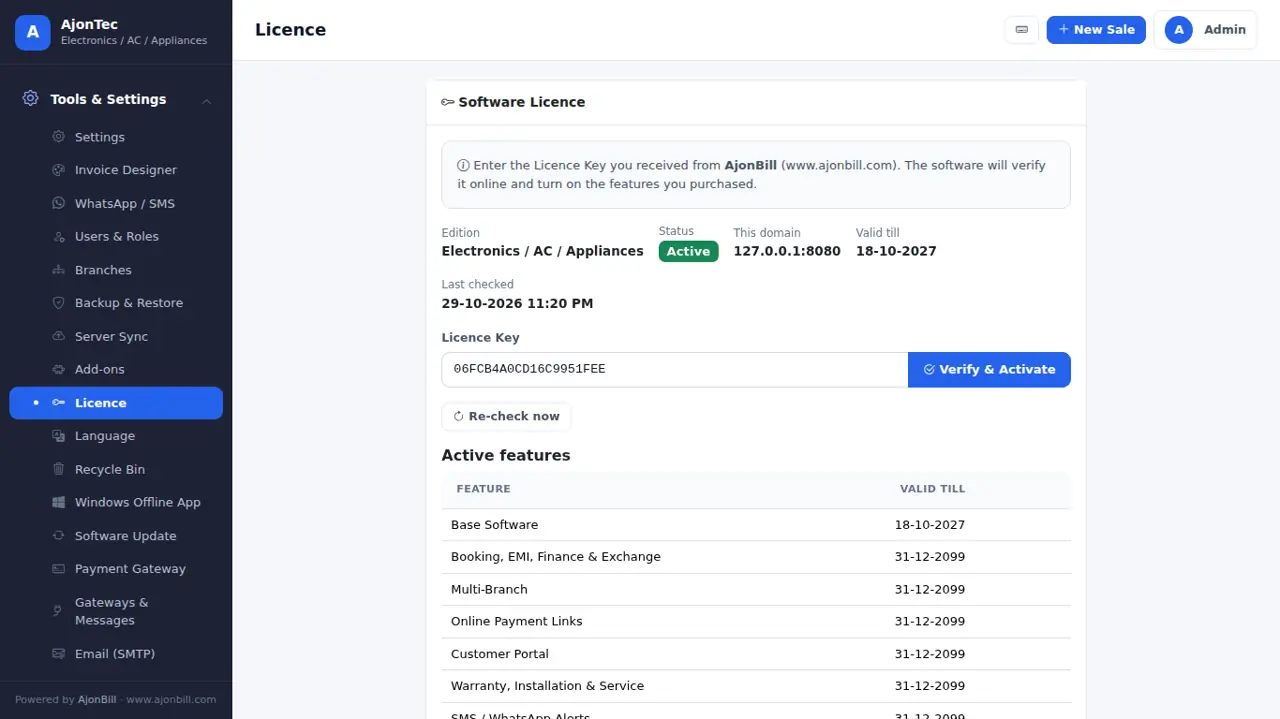
22. Licence
Tools & Settings → Licence: plan, validity, add-ons and Re-check licence. Renew before the end date from here or from your account - it switches on at once.
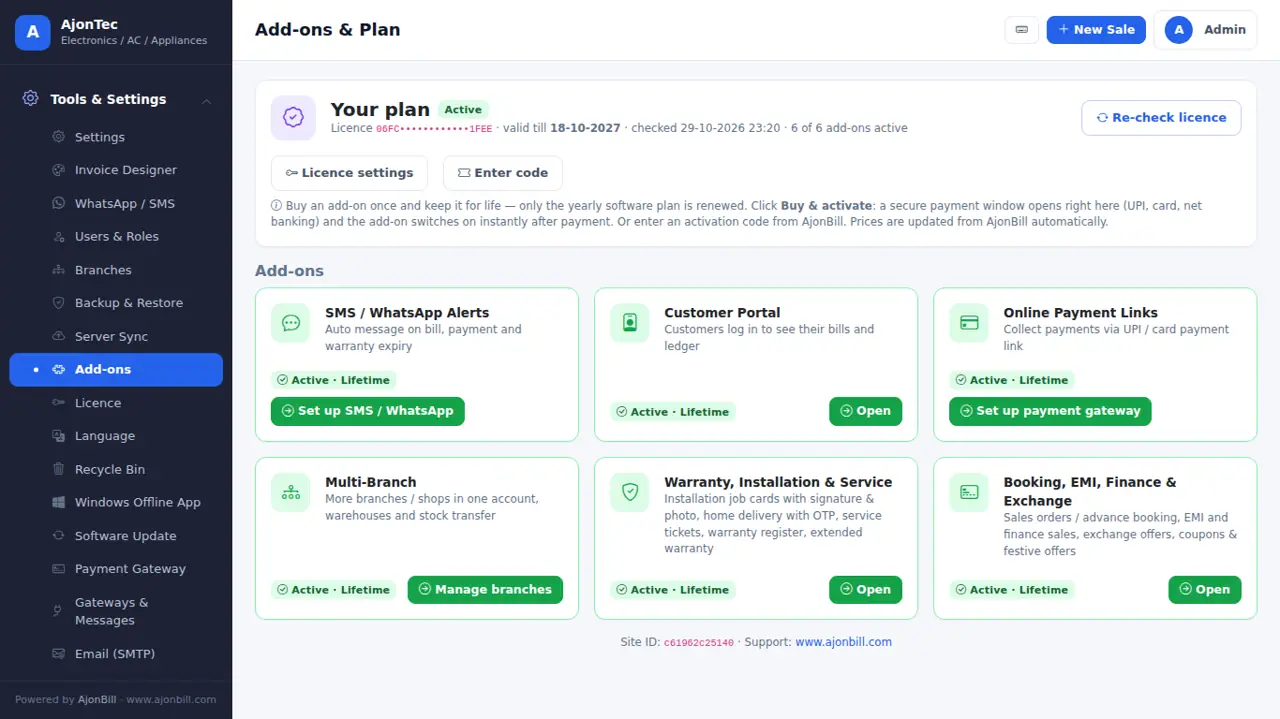
23. Add-ons
Tools & Settings → Add-ons → Buy & activate: a secure payment window opens; the add-on switches on right after payment. One-time payment, yours for life. Options of add-ons you have not bought stay hidden.
- SMS / WhatsApp Alerts - bill, payment, due and warranty messages.
- Customer Portal - customers see their bills and ledger.
- Online Payment Links - customers pay by UPI / card on your own gateway.
- Multi-Branch - more shops, warehouses, stock transfer.
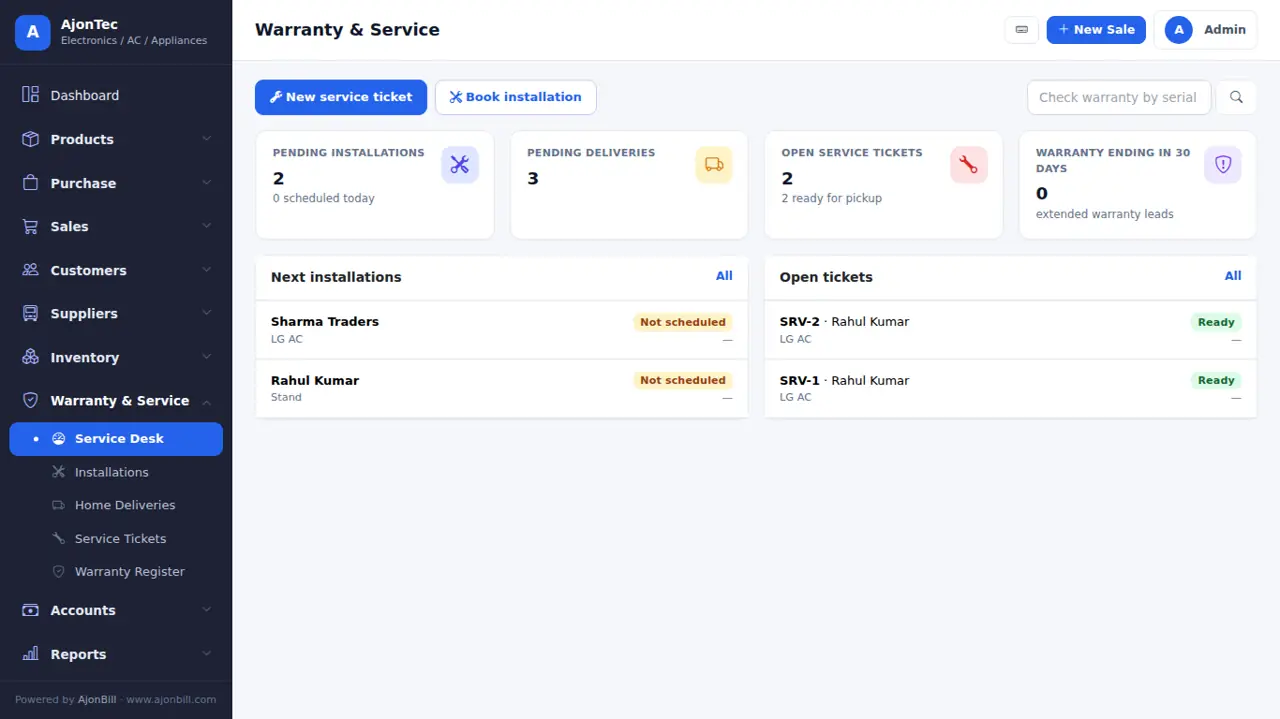
- Warranty, Installation & Service - job cards with signature and photo, delivery OTP, service tickets, extended warranty.
- Booking, EMI, Finance & Exchange - advance booking, EMI / finance sales, exchange, coupons & offers.
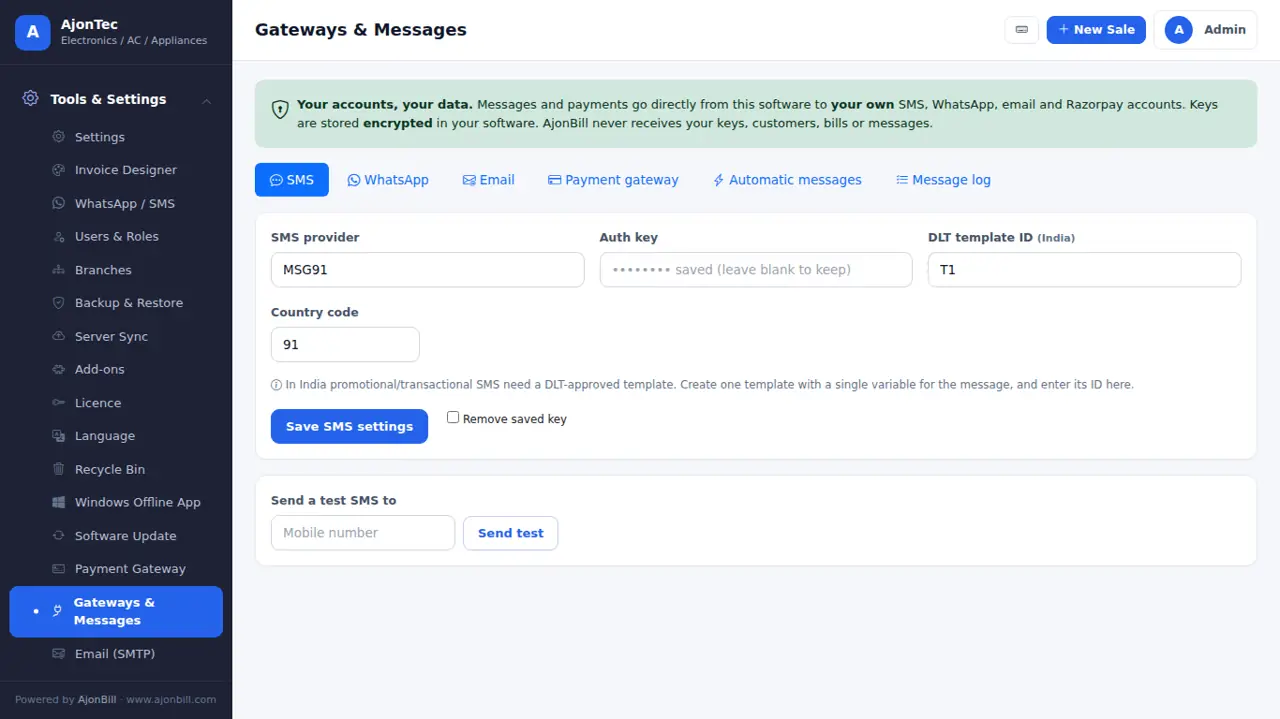
24. SMS, WhatsApp, email & payment gateways (your own accounts)
Tools & Settings → Gateways & Messages. Every message and payment uses your own provider account; your keys are stored encrypted. Tabs appear for the add-ons you have.
Email (SMTP) - free
- Gmail: Google Account → Security → 2-Step Verification on → App passwords → create one for "Mail".
- Fill host
smtp.gmail.com, port587, TLS, your Gmail and the 16-letter app password → Send test. - Hostinger mail: host
smtp.hostinger.com, port465, SSL, your mailbox and its password.
SMS (MSG91 / Fast2SMS / Twilio / Textlocal)
- Create an account with the provider and finish DLT registration (required in India) - register your sender ID and templates.
- Copy the API key / auth key, sender ID and template IDs from the provider dashboard.
- Paste them in the SMS tab → Send test.
WhatsApp (Cloud API)
- Meta Business Suite → WhatsApp Manager → add your number → create message templates and wait for approval.
- Meta for Developers → your app → WhatsApp → copy the Phone number ID and a permanent access token.
- Paste them in the WhatsApp tab with the template names → Send test.
Payment gateway (Razorpay, PayU, CCAvenue, Paytm, PhonePe, PayPal)
- Open a merchant account and finish KYC. Add your website domain in the gateway dashboard (Razorpay / CCAvenue need it).
- Razorpay: Dashboard → Account & Settings → API Keys → generate → copy Key ID and Key Secret. PayU: Dashboard → Developer → Key & Salt. Paytm: Developer Settings → API Keys (website
DEFAULTfor live,WEBSTAGINGfor test). PhonePe: Standard Checkout (PG) keys. PayPal: set the currency and rate. - Paste them in the Payment gateway tab, keep Test mode on, make a ₹1 test, then switch to Live.
25. For your business: Restaurant / Cafe
Ready for you: Menu by category, table / token number, thermal bills, stock optional.
Turn features on or off any time in Settings → Features (brand & model, serial / IMEI, warranty, batch & expiry, size & colour, MRP, barcode).
26. Problems & solutions
- "Licence not active" - Tools & Settings → Licence → Re-check. Check the computer date & time and the internet.
- Windows: "Could not reach www.ajonbill.com" - check the internet and the computer date & time; the message shows a code for support.
- Windows: "Password is wrong" - use the ajonbill.com account password, or click Email me a code.
- Item not added: "Not enough stock" - add stock through a Purchase or turn on Allow negative stock.
- Logo / photos missing after moving - restore the Photos & logo (zip) into
storage/uploads. - Need help? My Account → Support tickets, or WhatsApp / email on ajonbill.com/contact.
27. What's new (version history)
v3.7.2 · 30 Oct 2026 - User manual in the software
- New: User Manual link at the bottom of the menu - opens the complete guide of your software
- New: online user manual with real screens for every module, with the version and what is new in each update
- New: software for every business - General Store, Grocery / Kirana, Medical / Pharmacy, Garments / Footwear, Hardware / Sanitary, Mobile / Computer Shop and Restaurant / Cafe
- Each starts with its own categories, units, bill style and fields (batch & expiry, size & colour, IMEI, table no.)
- Same licence, updates, Windows app, server sync and all billing features
v3.7.0 · 29 Oct 2026 - Software for every business
- New: software for every business - General Store, Grocery / Kirana, Medical / Pharmacy, Garments / Footwear, Hardware / Sanitary, Mobile / Computer Shop and Restaurant / Cafe
- Each starts with its own categories, units, bill style and fields (batch & expiry, size & colour, IMEI, table no.)
- Same licence, updates, Windows app, server sync and all billing features